
移动端显示目录
找了很多别人的代码,发现在移动端都是显示不了。收到 大佬 的启发,我觉得有可能是移动端在垂直排布时会把右边栏隐藏掉,所以找到 assets/scss/partials/sidebar.scss 找到第73行 display: none; ,把它注释掉:
 1.right-sidebar {
 2    width: 100%;
 3    display: none;
 4    flex-direction: column;
 5    gap: var(--widget-separation);
 6
 7    &.sticky {
 8        top: 0;
 9    }
10
11    @include respond(lg) {
12        padding-top: var(--main-top-padding);
13        padding-bottom: var(--main-top-padding);
14    }
15}
然后修改 layouts/partials/widget/toc.html 为:
  1{{ if (.Context.Scratch.Get "TOCEnabled") }}
  2    <!-- TOC Toggle Button (visible on small screens) -->
  3    <button id="toc-toggle" class="toc-toggle-button" aria-label="Toggle Table of Contents">
  4        {{ partial "helper/icon" "hash" }}
  5    </button>
  6
  7    <section class="widget archives" id="toc-container">
  8        <div class="widget-icon">
  9            {{ partial "helper/icon" "hash" }}
 10        </div>
 11        <h2 class="widget-title section-title">{{ T "article.tableOfContents" }}</h2>
 12
 13        <div class="widget--toc">
 14            {{ .Context.TableOfContents }}
 15        </div>
 16    </section>
 17
 18    <style>
 19        /* TOC responsive styles */
 20        @media screen and (max-width: 768px) {
 21            #toc-container {
 22                position: fixed;
 23                top: 0;
 24                left: -300px; /* Hide off-screen by default */
 25                width: 280px;
 26                height: 100vh;
 27                background: linear-gradient(
 28                    to bottom,
 29                    rgba(82, 37, 70, 0.9),
 30                    rgba(136, 48, 78, 0.85)
 31                );
 32                box-shadow: 2px 0 8px rgba(94, 95, 92, 0.943);
 33                z-index: 1000;
 34                overflow-y: auto;
 35                transition: left 0.6s ease;
 36                padding: 20px;
 37            }
 38
 39            #toc-container.show {
 40                left: 0; /* Show when class is added */
 41            }
 42
 43            .toc-toggle-button {
 44                position: fixed;
 45                right: 10px;
 46                top: 50%;
 47                transform: translateY(-50%);
 48                z-index: 999;
 49                width: 40px;
 50                height: 40px;
 51                border-radius: 50%;
 52                background: rgba(226, 235, 61, 0.943);
 53                border: 1px solid rgba(226, 235, 61, 0.943);
 54                display: flex;
 55                align-items: center;
 56                justify-content: center;
 57                cursor: pointer;
 58                box-shadow: 0 2px 5px #e84242e4;
 59            }
 60
 61            body.toc-open {
 62                overflow: hidden; /* Prevent scrolling when TOC is open */
 63            }
 64        }
 65
 66        @media screen and (min-width: 769px) {
 67            .toc-toggle-button {
 68                display: none; /* Hide button on larger screens */
 69            }
 70        }
 71    </style>
 72
 73    <script>
 74        document.addEventListener('DOMContentLoaded', function() {
 75            const tocToggle = document.getElementById('toc-toggle');
 76            const tocContainer = document.getElementById('toc-container');
 77            const body = document.body;
 78
 79            tocToggle.addEventListener('click', function() {
 80                tocContainer.classList.toggle('show');
 81                body.classList.toggle('toc-open');
 82            });
 83
 84            // Close TOC when clicking outside of it
 85            document.addEventListener('click', function(e) {
 86                if (window.innerWidth <= 768) {
 87                    const isClickInsideTOC = tocContainer.contains(e.target);
 88                    const isClickOnButton = tocToggle.contains(e.target);
 89
 90                    if (!isClickInsideTOC && !isClickOnButton && tocContainer.classList.contains('show')) {
 91                        tocContainer.classList.remove('show');
 92                        body.classList.remove('toc-open');
 93                    }
 94                }
 95            });
 96
 97            // Add this: Close TOC when clicking on any link inside the TOC
 98            tocContainer.querySelectorAll('a').forEach(link => {
 99                link.addEventListener('click', function() {
100                    if (window.innerWidth <= 768) {
101                        tocContainer.classList.remove('show');
102                        body.classList.remove('toc-open');
103                    }
104                });
105            });
106        });
107    </script>
108{{ end }}
这样就能在左边显示目录的按钮啦!但是由于上面的方法是简单粗暴的取消右边栏的隐藏,所以就算是在主页往下滑也能看见搜索、归档、标签和分类栏,我是觉得这样还不错,就不折腾了(其实是懒得改)。
多语言文字字体修改
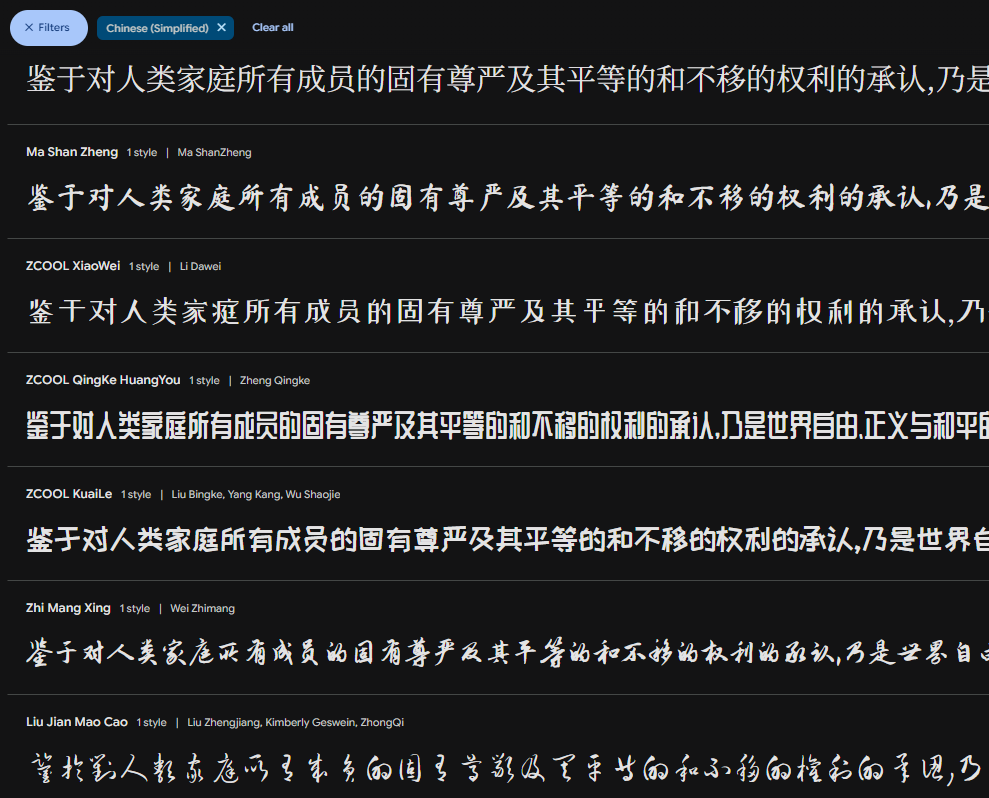
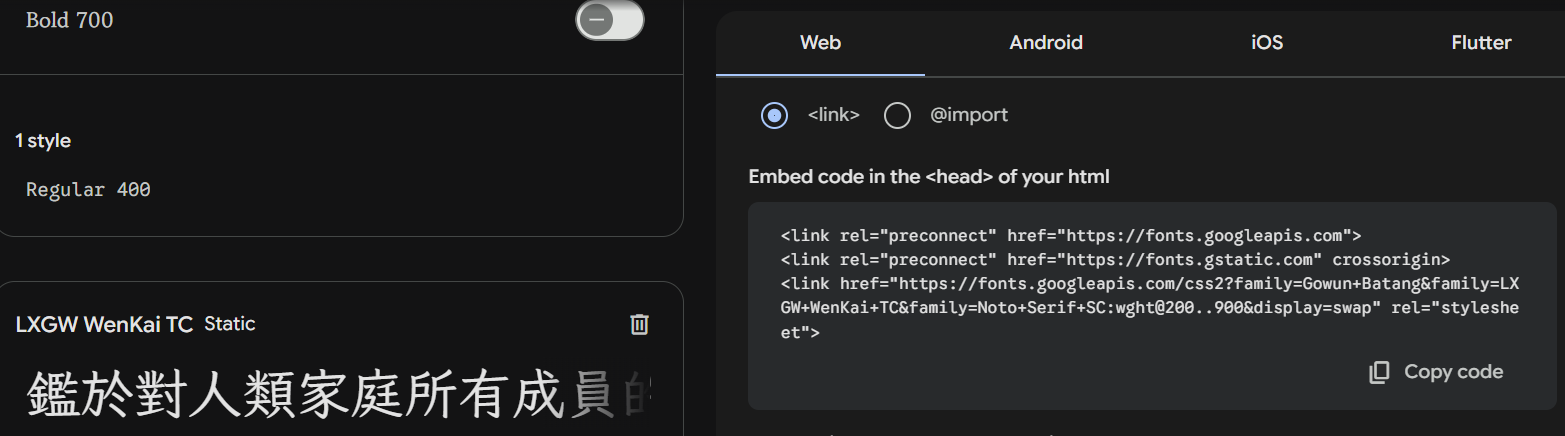
参考大佬的教程去Google fonts上找了一下,发现简中的都是抽象得不能再抽象的字体。然后转头去找繁体的字体,发现虽然同样只有8种字体,但这不比简中的好看多了?
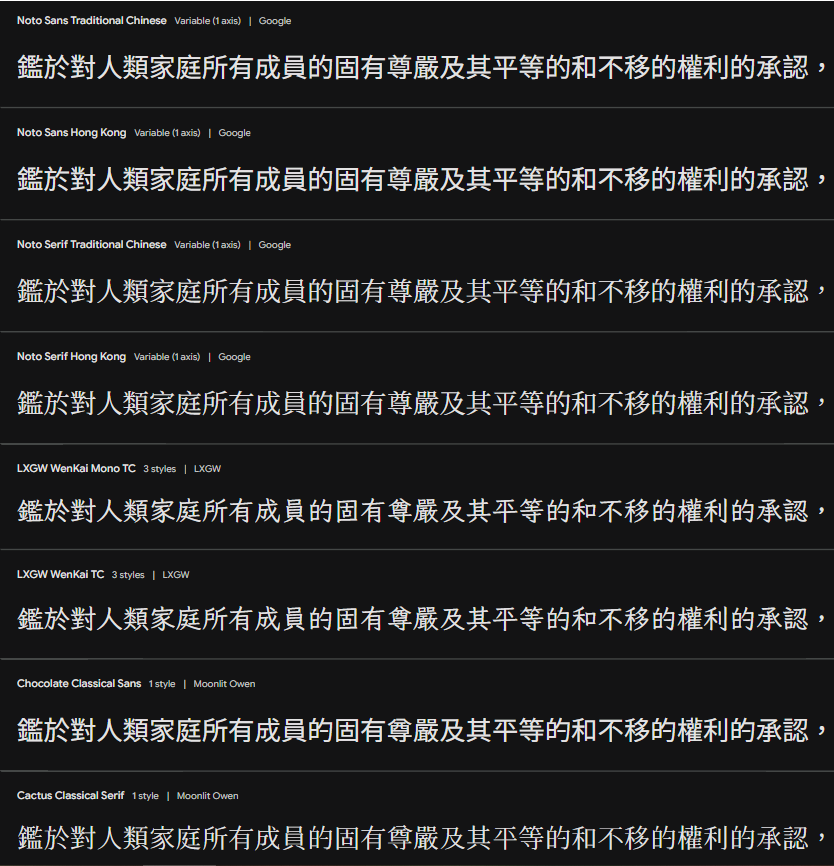
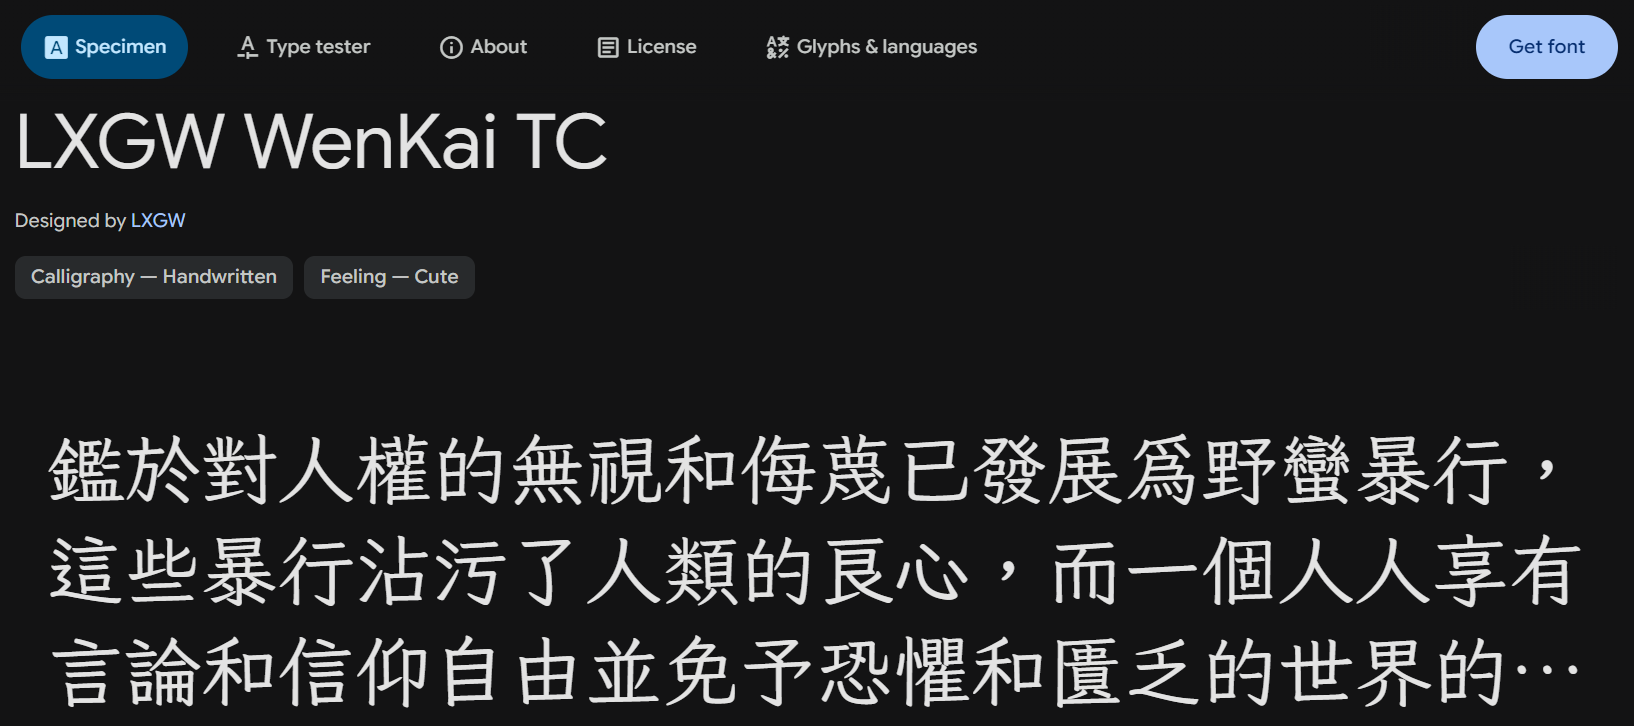
然后我惊奇的发现,我用的 LXGW WenKai TC 字体是能支持简中的。好你个谷歌做的什么**玩意(骂骂咧咧)
比如我选择 LXGW WenKai TC 这个字体,点击右上角的
然后点击左侧的
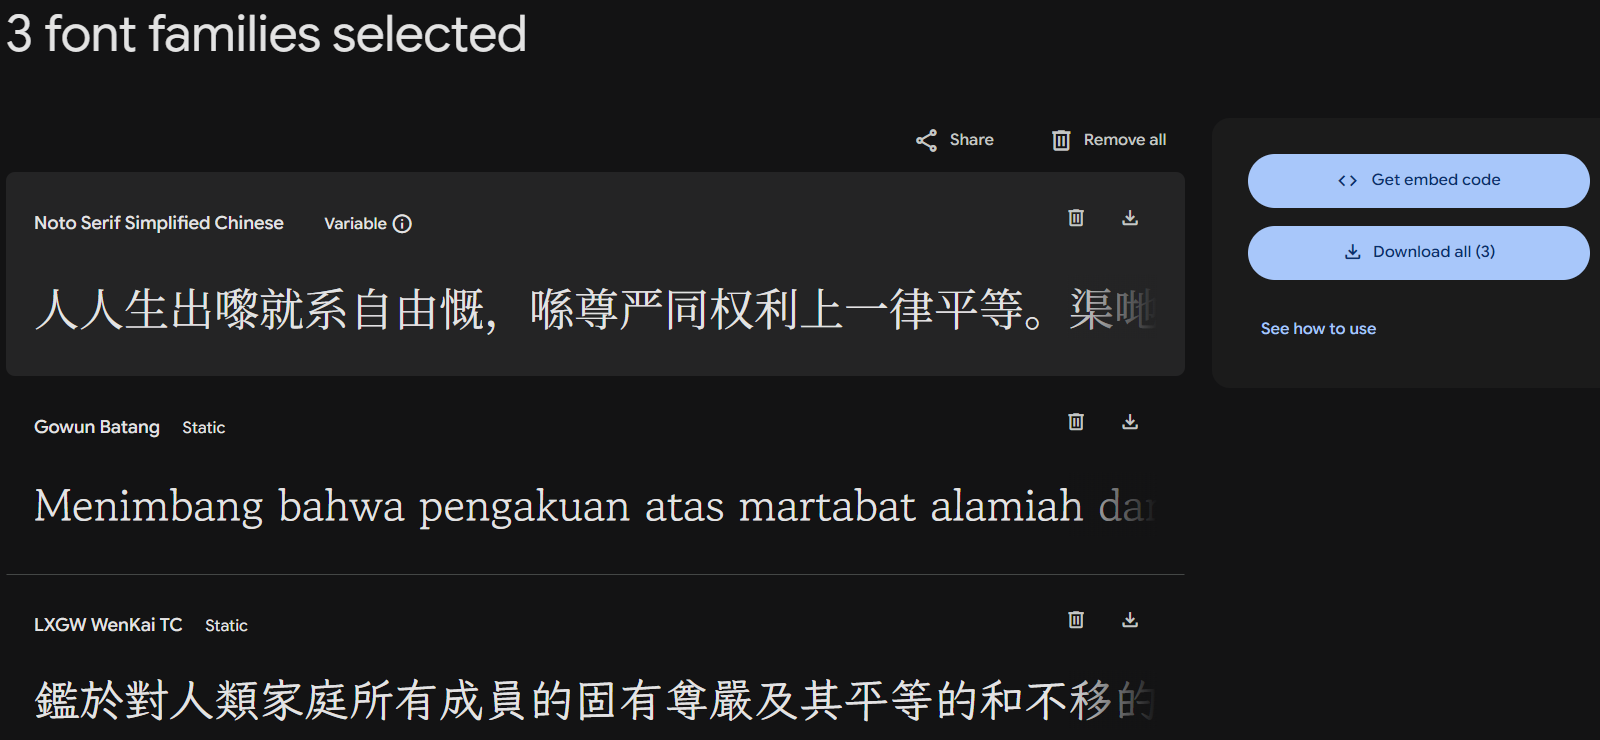
复制右边的代码,把原先 layouts/partials/footer/components/custom-font.html 里的内容全部注释掉,贴进去
如果想选多种字体,就按相同的步骤在 family= 后面跟上你想用的字体名称。
我修改后的 custom-font.html 内容如下:
 1<!-- <script>
 2    (function () {
 3        const customFont = document.createElement('link');
 4        customFont.href = "https://fonts.googleapis.com/css2?family=Lato:wght@300;400;700&display=swap";
 5
 6        customFont.type = "text/css";
 7        customFont.rel = "stylesheet";
 8
 9        document.head.appendChild(customFont);
10    }());
11</script> -->
12
13<link rel="preconnect" href="https://fonts.googleapis.com">
14<link rel="preconnect" href="https://fonts.gstatic.com" crossorigin>
15<link href="https://fonts.googleapis.com/css2?family=LXGW+WenKai+TC&family=Gowun+Batang&family=Noto+Serif+SC:wght@300&family=Noto+Serif+TC:wght@300&display=swap" rel="stylesheet">
然后我又发现了一个问题:多语言要怎么设置呢?网上找了一圈也没找着答案,凭我三脚猫的功夫看文档也搞不定这个问题啊。在我抓耳挠腮几近放弃的时候,突然想起了近几年最伟大的发明————AI!于是去问了Claude3.7,终于解决了(不愧是代码届的神)。大佬的老方法是在 custom.scss 最后加入:
1body, .article-content {
2    // font-family: 'Long Cang', cursive;
3    // font-family: 'Ma Shan Zheng', cursive;
4    // font-family: 'Noto Sans SC', sans-serif;
5    font-family: 'Noto Serif SC', serif;
6    // font-family: 'Zhi Mang Xing', cursive;
7}
但是我韩语的字体还是默认的。按照Claude3.7的回答,只需要在 custom.scss 最后加入:
1/* 为中英韩文内容设置字体 */
2:lang(en),
3:lang(zh-cn),
4:lang(ko),
5:lang(zh-hk) {
6  font-family: "LXGW WenKai TC", "Gowun Batang", serif;
7}
这样简中、繁中都是 LXGW WenKai TC 字体,韩语都是 Gowun Batang 字体啦!
英语是 LXGW WenKai TC 附带的字体,我觉得还不错就不改了。
我还添加了第二字体,比如说韩语界面如果有中文的话就不会回退到默认的中文字体,而是用 LXGW WenKai TC 字体。
至于韩语界面,我发现如果把 Gowun Batang 放前面 LXGW WenKai TC 放后面的话,那英文字体就会用 Gowun Batang 的,跟后者相比感觉略逊一筹。所以直接把 LXGW WenKai TC 放在最前面,然后四种语言合并在一起就好了。


但是好像有个问题,因为是谷歌CDN fonts.googleapis.com 的字体,第一次加载会有点慢(有时候不止第一次)。暂时把 fonts.googleapis.com 改成 fonts.googleapis.cn ,其实好像也没差多少,索性不管了,反正也不至于特别慢吧~~。
碎碎念页面
前置准备
可以用 Artitalk.js 来完成一个碎碎念的页面。
- 在
hugo.yaml中找到homepage,在下方添加- type: artitalk。 - 在
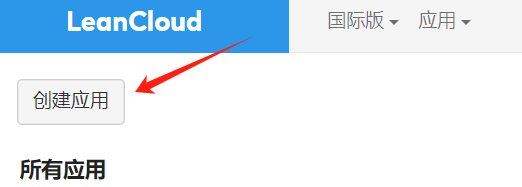
content/page文件夹下新建artitalk文件夹,其中新建index.md。 - 前往 LeanCloud 国际版,注册账号。
- 注册完成之后根据 LeanCloud 的提示绑定手机号和邮箱。
- 绑定完成之后点击
创建应用 ,应用名称随意。
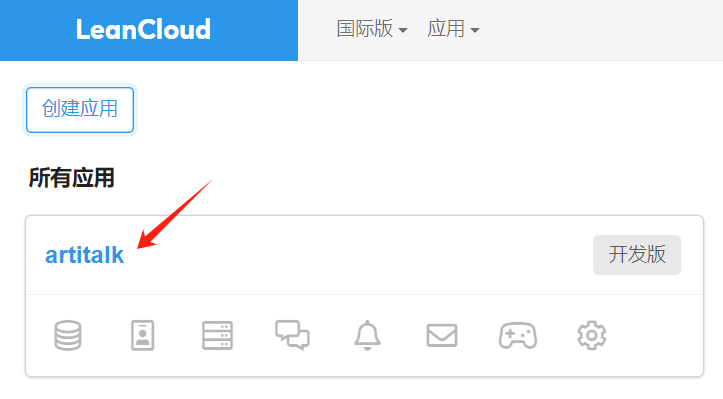
- 接着在
结构化数据中创建class,命名为shuoshuo。
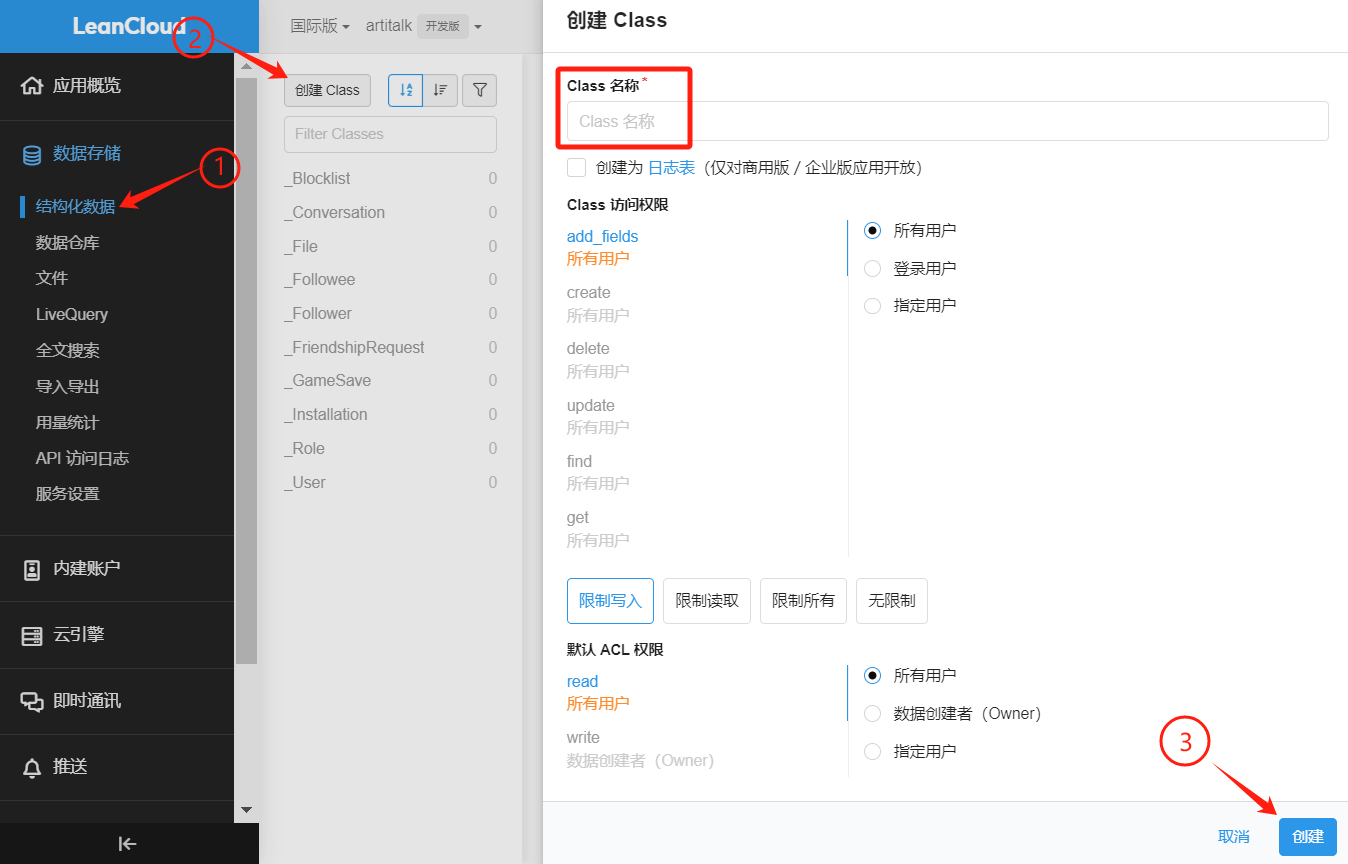
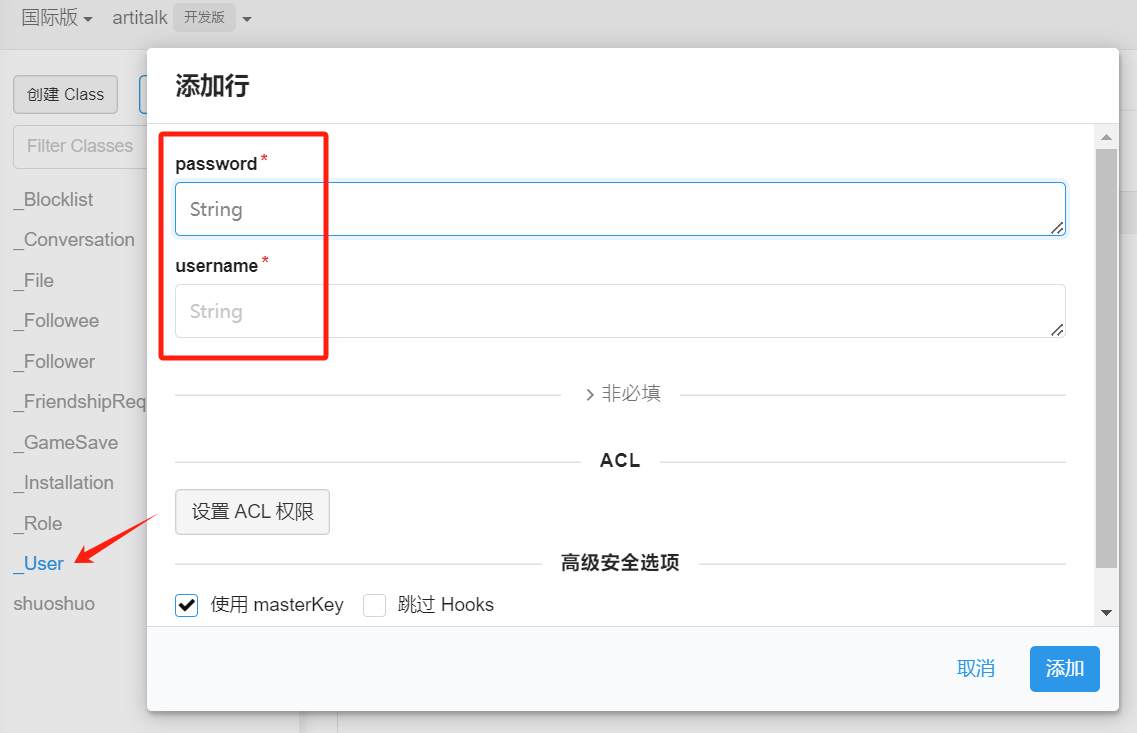
- 在你新建的应用中找到
结构化数据下的用户。点击添加用户,输入想用的用户名及密码。
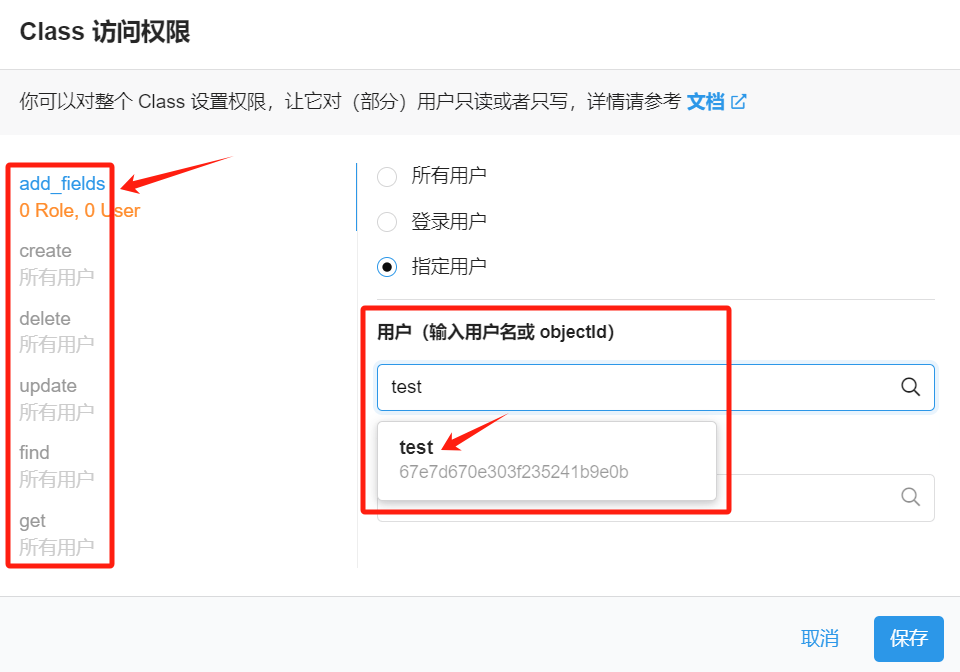
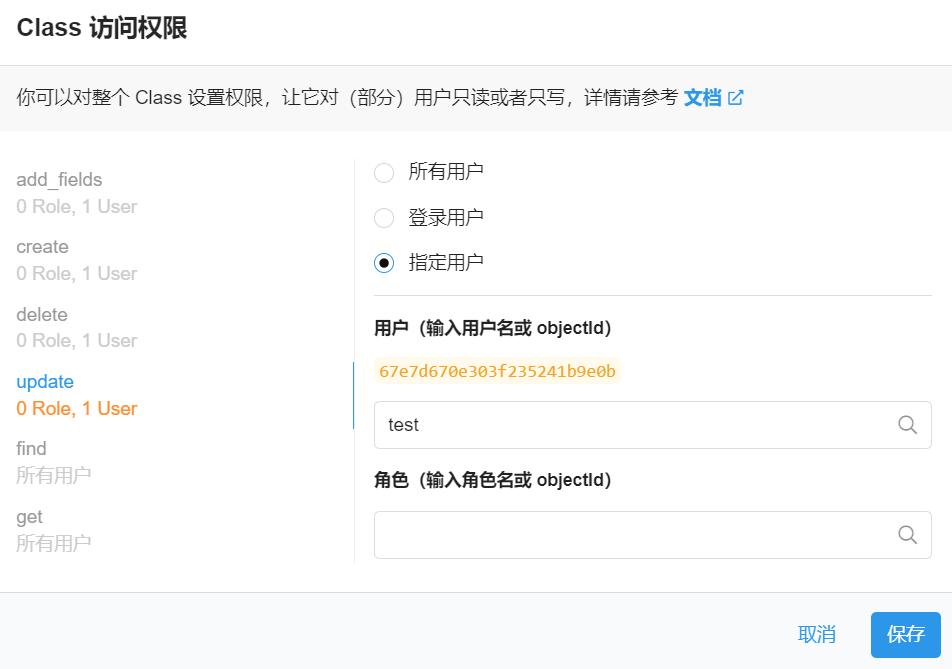
- 回到
结构化数据中,点击class下的shuoshuo。找到权限,在Class 访问权限中将add_fields以及create权限设置为指定用户,输入你刚才输入的用户名会自动匹配。为了安全起见,将delete和update也设置为跟它们一样的权限。

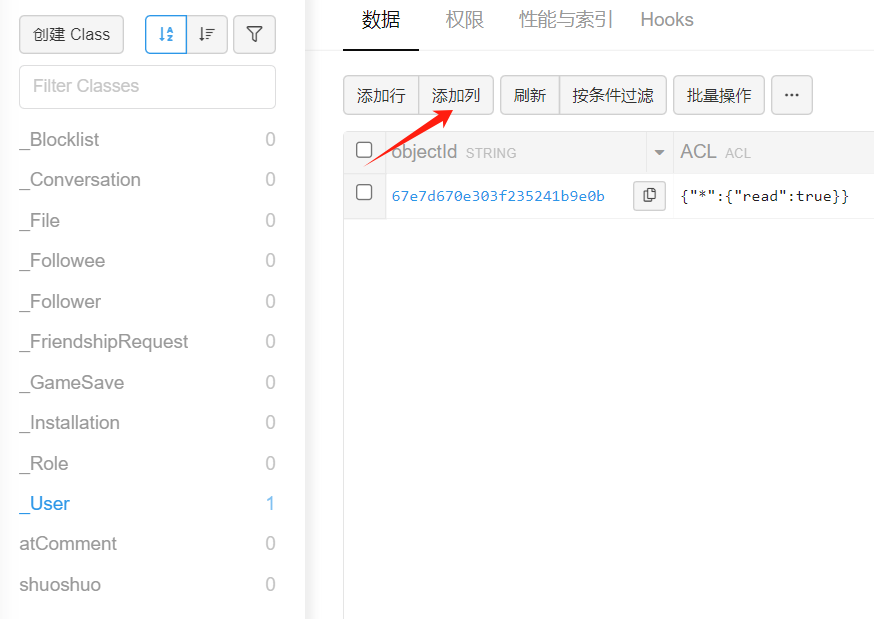
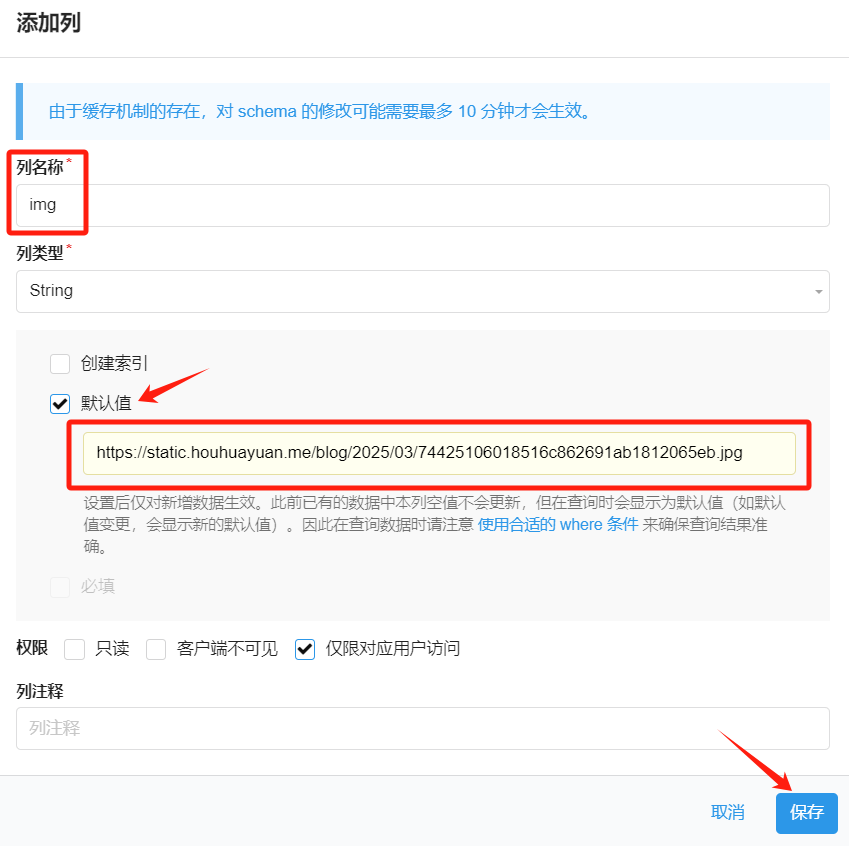
- 然后再新建一个名为
atComment的class,权限什么的使用默认的即可。 - 点击
_User,添加列,列名称为img,默认值填上你这个账号想要用的发布说说的头像url。这一项如果不进行配置,说说头像会显示为默认头像 —— Artitalk 的 logo。
- 在最菜单栏中找到设置 -> 应用 keys,记下来
AppID和AppKey,一会会用。

- 最后将
_User中的权限全部调为指定用户,或者数据创建者,为了保证不被篡改用户数据以达到强制发布说说。

踩坑记录
由于 LeanCloud 的域名疑似被墙了,最好在 cloudflare 中创建 workers 进行部署。在 workers 中填入以下 代码:
 1//此脚本由MHuiG - MiniValine写成,ChenYFan将其做少量修改制成,此脚本仅适用于Artitalk
 2
 3async function handleRequest(event) {
 4  AppId = (function () { try { return APPID } catch (e) { return "" } })()
 5  AppKey = (function () { try { return APPKEY } catch (e) { return "" } })()
 6  if (AppId == "" || AppKey == "") { return new Response('Artitalk-Safe异常:您没有设定appid和appkey') }
 7  ServerDomain = (function () { try { return SERVERDOMAIN } catch (e) { return `${(AppId.substr(0, 8)).toLowerCase()}.api.lncldglobal.com` } })()
 8  atComment = (function () { try { return ATCOMMENT == "true" ? true : false } catch (e) { return true } })()
 9  CORS = (function () { try { return CORS } catch (e) { return '*' } })()
10  const request = event.request
11  const url = new URL(request.url)
12  const urlObj = new URL(url)
13  const path = urlObj.href.substr(urlObj.origin.length)
14  const classac = l(rp(path).split('/'))
15  if (classac == "atComment" && !atComment) { return new Response('{"code":101,"error":"Artitalk-Safe:评论功能未开启"}', { headers: { "content-type": "application/json;charset=utf-8" } }) }
16  if (classac == "_File" || classac == "_Followee" || classac == "_Follower" || classac == "_Installation" || classac == "_Role") { return new Response('{"code":101,"error":"Artitalk-Safe:操作是禁止的"}', { headers: { "content-type": "application/json;charset=utf-8" } }) }
17
18  url.hostname = ServerDomain
19  reqHEDNew = new Headers(request.headers)
20  if (reqHEDNew.get("X-LC-Id")) {
21    reqHEDNew.set("X-LC-Id", AppId)
22    reqHEDNew.set("X-LC-Key", AppKey)
23  }
24  if (reqHEDNew.get("x-lc-sign")) {
25    reqHEDNew.delete("X-LC-Sign")
26  }
27  reqNew = new Request(request, { headers: reqHEDNew })
28  responsefetch = await fetch(url.toString(), reqNew)
29  resHEDNew = new Headers(responsefetch.headers)
30  resHEDNew.set("Access-Control-Allow-Origin", CORS)
31  response = new Response(responsefetch.body, { headers: resHEDNew })
32  return response
33}
34function rp(p) {
35  return p.split("?")[0]
36}
37function l(p) {
38  return p[getJsonLength(p) - 1]
39}
40
41
42function getJsonLength(jsonData) {
43
44  var jsonLength = 0;
45
46  for (var item in jsonData) {
47
48    jsonLength++;
49
50  }
51
52  return jsonLength;
53}
54addEventListener("fetch", event => {
55  event.respondWith(handleRequest(event))
56})
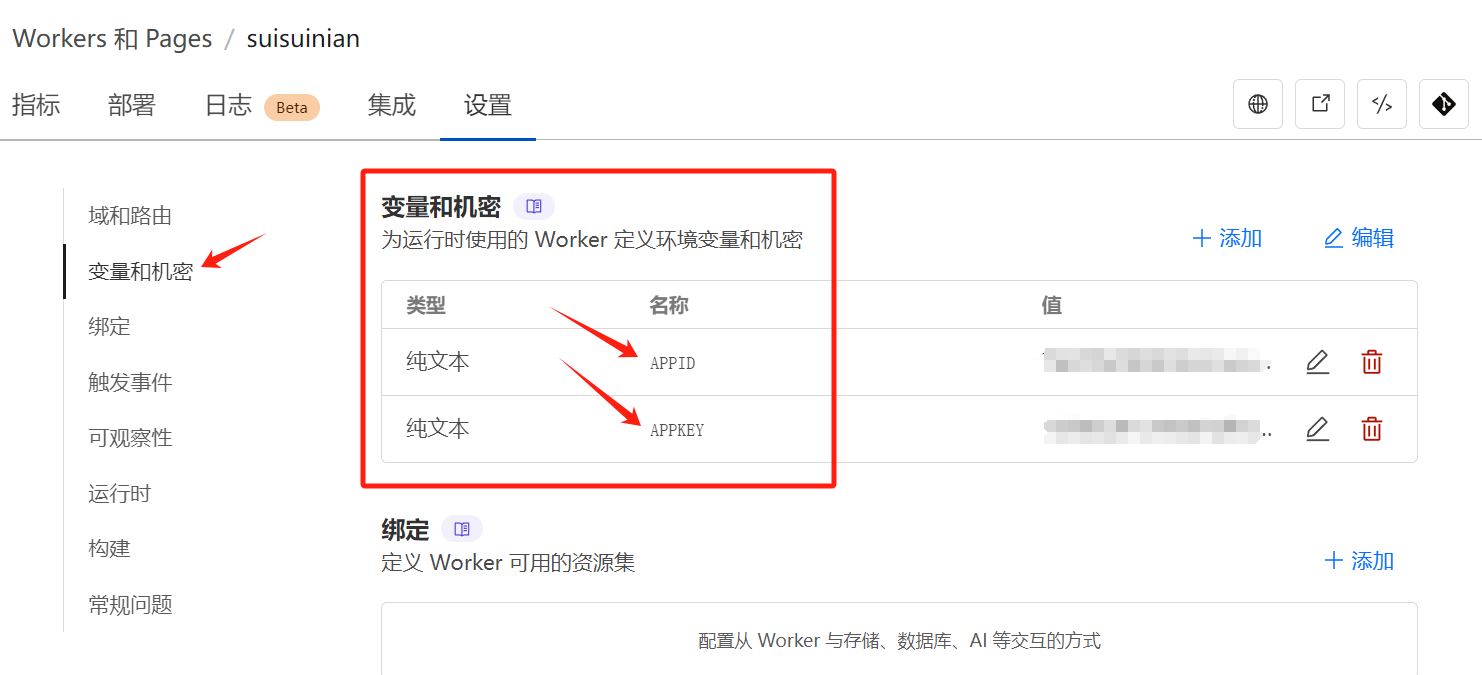
设置两个变量APPID和APPKEY
变量名务必大写!!!
最后在layouts/_default/下新增artitalk.html, 并修改样式如下。
注意,用 (貌似无法正常使用)cloudflare workers 是 Artitalk.js 推荐的 Artitalk_SafeMode,通过中间件的方式,在中间件替换 APPID 和 APPKEY 保护两者,避免两者暴露被刷。因此你可以在前端随意伪造 APPID 和 APPKEY ,然后将 serverurl 修改为中间件网址即可。
 1{{ define "main" }}
 2    <!-- 引用 artitalk -->
 3    <script type="text/javascript" src="https://unpkg.com/artitalk"></script>
 4    <!-- 存放说说的容器 -->
 5    <div id="artitalk_main"></div>
 6    <script>
 7        new Artitalk({
 8            appId: '', // 随便填
 9            appKey: '', // 随便填
10            pageSize: 15, // 每页说说数量
11            color3: "var(--card-text-color-main)", // 文字颜色
12            color1: "var(--card-background)", // 背景颜色1
13            color2: "var(--card-background)", // 背景颜色2
14            serverURL: "", // 你的cloudflare worker域名,可以绑定自己的域名
15        })
16    </script>
17{{ end }}
最后配置
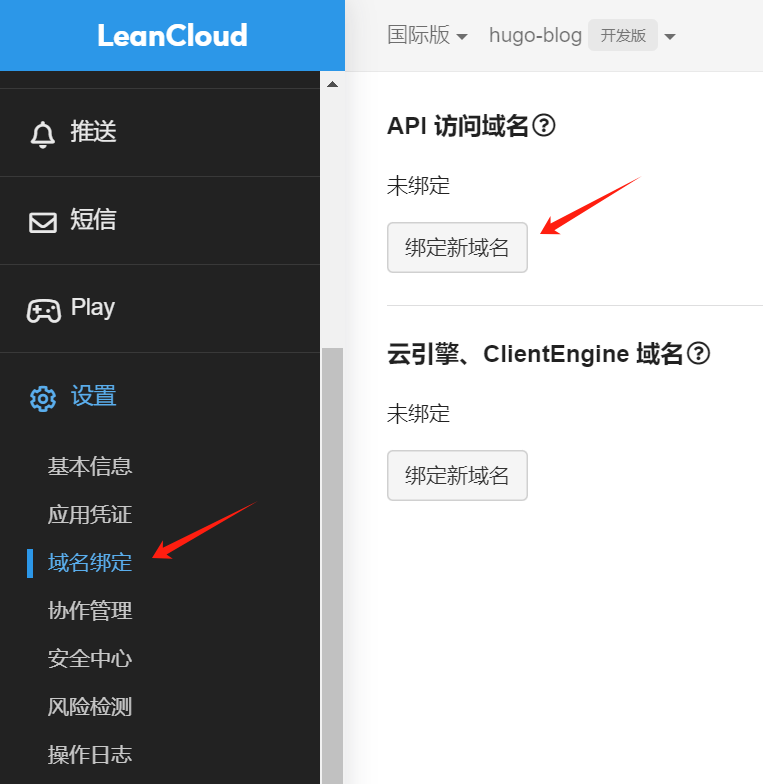
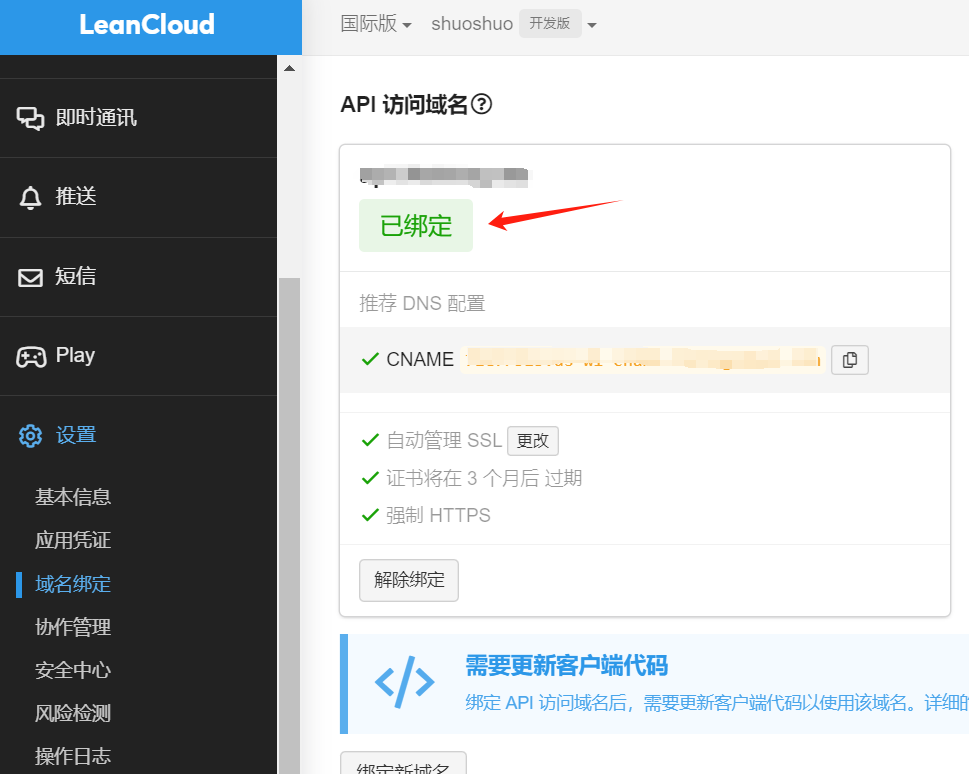
- 但是发现用cf workers还是会被墙,无法正常使用。只能绕个弯路,给应用绑定一个api域名:点击设置 -> 域名绑定 ->
绑定新域名
- 然后去cloudflare的对应域名添加上这个
CNAME记录就可以了。
注意,不要开启小黄云!!!
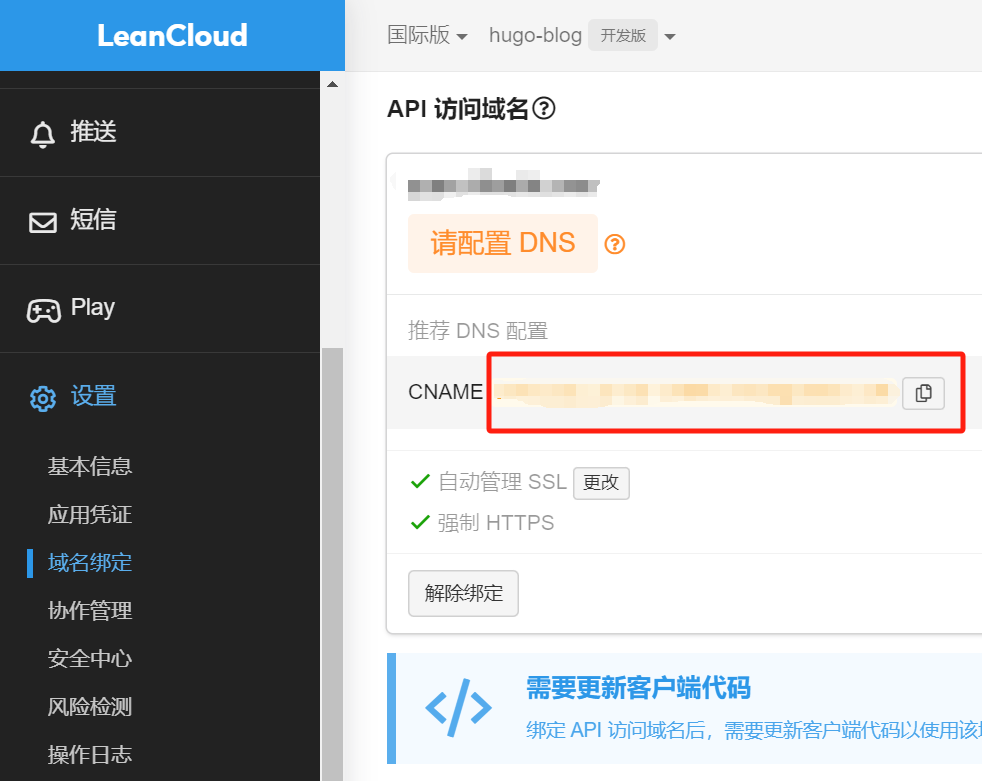
- 添加
CNAME记录之后它会自动帮你申请证书,等待大概几分钟之后显示“已绑定”,就大功告成啦!
- 最后在
layouts/_default/下新增artitalk.html, 并修改样式如下。
 1{{ define "main" }}
 2    <!-- 引用 artitalk -->
 3    <script type="text/javascript" src="https://unpkg.com/artitalk"></script>
 4    <!-- 存放说说的容器 -->
 5    <div id="artitalk_main"></div>
 6    <script>
 7        new Artitalk({
 8            appId: '', // your appId
 9            appKey: '', // your appKey
10            pageSize: 15, // 每页说说数量
11            color3: "var(--card-text-color-main)", // 文字颜色
12            color1: "var(--card-background)", // 背景颜色1
13            color2: "var(--card-background)", // 背景颜色2
14            serverURL: "", // 上面绑定的api域名
15        })
16    </script>
17{{ end }}
然后我发现这个碎碎念页面加载有时候很慢,感觉还是js的问题。跟热力图的方案一样,把js下载下来放到 static/js 文件夹里,然后把 artitalk.html 里第二行改成:
1<script type="text/javascript" src="/js/artitalk.js"></script>
最后我发现星屑右下角的发布按钮会被我的返回顶部按钮与聊天气泡重叠,并且暗黑模式下预览框的文字是黑色的看不见,于是在 assets/scss/custom.scss 里稍微修改了一下:
 1#artitalk_main .artitalk_child {
 2    margin-right: 15%;
 3}
 4
 5#artitalk_main .power {
 6  margin-right: 15%;
 7  margin-bottom: 2%;
 8}
 9
10[data-scheme="dark"] {
11  #artitalk_main #preview {
12    color: #FFF;
13  }
14}
右侧导航栏动画
参考链接,在 assets/scss/custom.scss 中加入以下代码:
 1/*------------------右侧导航栏--------------*/
 2// 搜索菜单动画
 3.search-form.widget {
 4  transition: transform 0.6s ease;
 5}
 6
 7.search-form.widget:hover {
 8  transform: scale(1.1, 1.1);
 9}
10
11
12//归档小图标放大动画
13.widget.archives .widget-archive--list {
14  transition: transform .3s ease;
15}
16
17.widget.archives .widget-archive--list:hover {
18  transform: scale(1.05, 1.05);
19}
20
21
22//右侧标签放大动画
23.tagCloud .tagCloud-tags a {
24  border-radius: 10px;
25  font-size: 1.4rem;
26  transition: transform .3s ease;
27}
28
29.tagCloud .tagCloud-tags a:hover {
30  transform: scale(1.1, 1.1);
31}
相关文章卡片缩小
在 assets/scss/custom.scss 最后加上:
1.related-content article {
2  width: 200px;
3  height: 120px;
4}
自定义鼠标指针样式
参考了大佬的博客:hugo stack 主题美化 2 - yelleis的博客
- Custom Cursor选个喜欢的样式,截图(正方形);
- remove.bg或 RemovePhotos 改成透明底;
- 在线图片压缩工具尺寸压缩到 50x50;
- 上传到图床,复制链接到
url('')内即可。
增添到 assets/scss/custom.scss:
 1body {
 2  cursor: url(/img/pointer.png), auto;
 3}
 4
 5a:hover{
 6  cursor:url('/img/link.png'), pointer !important;
 7} //指向链接时的鼠标样式
 8
 9button:hover {
10  cursor: url('/img/text.png'), pointer !important;
11} //代码复制按钮
12
13input:hover {
14  cursor: url('/img/text.png'), text !important;
15} //评论框(好像没有用欸)
添加背景图片
参考链接,在 assets/scss/custom.scss 修改了一下字体颜色,然后加了个背景图:
 1:root {
 2  --accent-color: #255F38;
 3  --accent-color-darker: #FE4F2D;
 4  --accent-color-text: #FFF;
 5  --body-text-color: #4F1C51;
 6}
 7
 8:root {
 9  --card-background-selected: #EBEBEB;
10  --card-text-color-tertiary: #888B8D;
11}
12
13// 浅色模式背景图片设置
14[data-scheme="light"] body {
15  position: relative;
16  background-image: url('/img/bj.jpg'); // 替换为你的图片路径
17  background-attachment: fixed;
18  background-size: cover;
19  background-position: center;
20}
21
22// 添加遮罩层
23[data-scheme="light"] body::before {
24  content: '';
25  position: fixed;
26  top: 0;
27  left: 0;
28  width: 100%;
29  height: 100%;
30  z-index: -1;
31  backdrop-filter: blur(2px); // 可选:添加模糊效果
32  // 浅色模式遮罩(较浅)
33  background-color: rgba(255, 255, 255, 0.7);
34}
把滚动条换成进度条
弄了背景之后滚动条的背景块会跟随着主题的颜色走,找了很久也没找到解决办法。突然找到Hugo:阅读进度条,那我把滚动条隐藏起来换成进度条不就好了吗?把 assets/scss/custom.scss 里面滚动条的 display 属性改成 none。
1.menu::-webkit-scrollbar {
2  display: display;
3  display: none;
4}
如果在所有页面上都实现这个效果,可以将html代码插入到 layouts\_default\baseof.html 并引用css和js文件,若是只想在文章页面实现,可以插入到 layouts\_default\single.html。
1<progress id="content_progress" value="0"></progress>
2<link rel="stylesheet" href="/css/progress.css">
3<script src="/js/progress.js"></script>
然后新建 static\css\progress.css:
 1#content_progress {
 2    /* Positioning */
 3    position: fixed;
 4    left: 0;
 5    bottom: 0;
 6    z-index: 1000;
 7    width: 100%;
 8    height: 6px;
 9    -webkit-appearance: none;
10    -moz-appearance: none;
11    appearance: none;
12    border: none;
13    background-color: transparent;
14    color: #3F7D58;
15}
16
17#content_progress::-webkit-progress-bar {
18    background-color: transparent;
19}
20
21#content_progress::-webkit-progress-value {
22    background-color: #5F99AE;
23}
24
25#content_progress::-moz-progress-bar {
26    background-color: #5F99AE;
27}
新建 static\js\progress.js:
 1document.addEventListener('DOMContentLoaded', function () {
 2      var winHeight = window.innerHeight,
 3            docHeight = document.documentElement.scrollHeight,
 4            progressBar = document.querySelector('#content_progress');
 5      progressBar.max = docHeight - winHeight;
 6      progressBar.value = window.scrollY;
 7
 8      document.addEventListener('scroll', function () {
 9            progressBar.max = document.documentElement.scrollHeight - window.innerHeight;
10            progressBar.value = window.scrollY;
11      });
12});
但仅仅这么配置的话代码块也没有滚动条了,于是在 .highlight 部分加上滚动条配置。
1.highlight {
2  ::-webkit-scrollbar {
3    display: flex;
4  }
5}
主页添加樱花特效
之前弄的樱花特效,感觉用来配我新的主页背景挺合适的。但是我又觉得这个特效有点眼花缭乱,最后决定只让它在浅色模式下生效。打开 layouts/partials/footer/custom.html 在最后加上:
  1{{ if or .IsHome (eq .Layout "archives") (eq .Type "page") }}
  2<script>
  3(function() {
  4    // 检测当前是否为深色模式
  5    function isDarkTheme() {
  6        const savedTheme = localStorage.getItem('StackColorScheme');
  7        const prefersDark = window.matchMedia('(prefers-color-scheme: dark)').matches;
  8        const htmlHasDarkClass = document.documentElement.classList.contains('dark');
  9
 10        return savedTheme === 'dark' || htmlHasDarkClass ||
 11               (savedTheme !== 'light' && prefersDark);
 12    }
 13
 14    // 完全清理樱花特效
 15    function cleanupSakuraEffect() {
 16        // 移除所有可能的樱花元素(多种可能的类名)
 17        ['sakura', 'ukiis-sakura'].forEach(className => {
 18            document.querySelectorAll('.' + className).forEach(el => el.remove());
 19        });
 20
 21        // 查找并移除可能的动画容器
 22        document.querySelectorAll('canvas[style*="position: fixed"]').forEach(el => el.remove());
 23
 24        // 停止可能存在的动画循环
 25        if (window.requestAnimationFrame && window.cancelAnimationFrame) {
 26            if (window.sakuraRequestId) {
 27                window.cancelAnimationFrame(window.sakuraRequestId);
 28                window.sakuraRequestId = null;
 29            }
 30        }
 31
 32        console.log('Sakura elements completely cleaned up');
 33    }
 34
 35    // 管理樱花特效的加载与移除
 36    function manageSakuraEffect() {
 37        const isDark = isDarkTheme();
 38        const existingScript = document.querySelector('script[src*="UkennWeb"]');
 39
 40        if (!isDark) {
 41            // 浅色模式:如果未加载则加载特效
 42            if (!existingScript) {
 43                const script = document.createElement('script');
 44                script.type = 'text/javascript';
 45                script.src = 'https://cdn.jsdelivr.net/gh/Ukenn2112/[email protected]/index/web.js';
 46                document.body.appendChild(script);
 47                console.log('Sakura effect added for light theme');
 48            }
 49        } else {
 50            // 深色模式:先清理特效,再移除脚本
 51            cleanupSakuraEffect();
 52
 53            // 移除脚本
 54            if (existingScript) {
 55                existingScript.remove();
 56                console.log('Sakura script removed for dark theme');
 57            }
 58
 59            // 查找并移除其他可能的相关脚本
 60            document.querySelectorAll('script[src*="sakura"]').forEach(el => el.remove());
 61        }
 62    }
 63
 64    // 初始加载时执行一次
 65    manageSakuraEffect();
 66
 67    // 监听localStorage变化(覆盖setItem方法)
 68    const originalSetItem = localStorage.setItem;
 69    localStorage.setItem = function(key, value) {
 70        originalSetItem.apply(this, arguments);
 71        if (key === 'StackColorScheme') {
 72            setTimeout(manageSakuraEffect, 100); // 添加短暂延迟确保DOM更新
 73        }
 74    };
 75
 76    // 精确监听html元素的class变化
 77    const observer = new MutationObserver((mutations) => {
 78        mutations.forEach((mutation) => {
 79            if (mutation.type === 'attributes' && mutation.attributeName === 'class') {
 80                setTimeout(manageSakuraEffect, 100); // 添加短暂延迟确保DOM更新
 81            }
 82        });
 83    });
 84
 85    observer.observe(document.documentElement, {
 86        attributes: true,
 87        attributeFilter: ['class']
 88    });
 89
 90    // 监听主题切换按钮点击事件
 91    document.addEventListener('click', (e) => {
 92        if (e.target.closest('.color-scheme-toggle')) {
 93            setTimeout(manageSakuraEffect, 300); // 延长延迟时间以确保主题切换完成
 94        }
 95    });
 96
 97    // 监听系统深色模式变化
 98    window.matchMedia('(prefers-color-scheme: dark)').addEventListener('change', () => {
 99        setTimeout(manageSakuraEffect, 100);
100    });
101
102    // 额外添加一个全局清理方法,以便在需要时手动调用
103    window.cleanupSakuraEffect = cleanupSakuraEffect;
104})();
105</script>
106{{ end }}
文章生成日历
新建文件 layouts/page/calendar.html ,加入以下代码:
  1{{ define "main" }}
  2
  3<style>
  4    #calendar {
  5        /* max-width: 1200px; */
  6        width: 90%; /* 使其占满可用空间 */
  7        margin: 50px auto;
  8        padding: 0 10px;
  9        border-radius: 8px;
 10        box-shadow: 0 2px 10px rgba(241, 62, 232, 0.9);
 11    }
 12
 13    /* 新增:按钮颜色自定义 */
 14    .fc-button-primary {
 15        background-color: #c511cb !important; /* 紫色 */
 16        border-color: #c511cbd7 !important;
 17    }
 18    .fc-button-primary:hover {
 19        background-color: #f476ffe0 !important; /* 深紫色 */
 20    }
 21
 22    .fc-toolbar-title {
 23        font-size: 1.3em;
 24        font-weight: bold;
 25    }
 26
 27    .fc-event {
 28        font-size: 0.8em;
 29        border-radius: 4px;
 30        padding: 2px;
 31    }
 32
 33    .fc-header-toolbar {
 34        padding: 10px 0;
 35    }
 36
 37    .fc-button {
 38        background-color: #f6ff00e3;
 39        border: none;
 40        border-radius: 4px;
 41        color: white;
 42        padding: 5px 10px;
 43        font-size: 0.9em;
 44        cursor: pointer;
 45    }
 46
 47    .fc-button:hover {
 48        background-color: #0056b3;
 49    }
 50
 51    .fc-button:disabled {
 52        background-color: #e0e0e0;
 53        color: #757575;
 54    }
 55
 56    .fc-toolbar-title {
 57        color: rgba(241, 62, 232, 0.9);
 58    }
 59
 60    .event-tooltip {
 61        position: absolute;
 62        z-index: 10001;
 63        background-color:rgba(234, 255, 0, 0.600);
 64        border: 1px solid #ccc;
 65        padding: 8px;
 66        border-radius: 4px;
 67        box-shadow: 0 2px 10px rgba(207, 50, 50, 0.1);
 68        font-size: 0.9em;
 69    }
 70
 71    /* 修复按钮间距问题 */
 72    .fc-button-group {
 73        gap: 4px; /* 增加按钮间的间隙 */
 74    }
 75
 76    /* 响应式调整 */
 77    @media (max-width: 768px) {
 78        #calendar {
 79            width: 95%;
 80            margin: 20px auto;
 81        }
 82        .fc-toolbar-title {
 83            font-size: 1em;
 84        }
 85        .fc-button {
 86            padding: 3px 6px;
 87            font-size: 0.8em;
 88        }
 89    }
 90
 91    @media (max-width: 480px) {
 92        #calendar {
 93            width: 100%;
 94            padding: 0 5px;
 95        }
 96        .fc-header-toolbar {
 97            flex-direction: column;
 98            align-items: center;
 99        }
100        .fc-toolbar-chunk {
101            margin-bottom: 5px;
102        }
103    }
104
105    @media (min-width: 1200px) {
106        #calendar {
107            max-width: 1100px;
108        }
109    }
110
111
112</style>
113
114<div id='calendar'></div>
115<script src='https://cdn.jsdelivr.net/npm/fullcalendar/index.global.min.js'></script>
116
117<script>
118    document.addEventListener('DOMContentLoaded', function () {
119        const calendarEl = document.getElementById('calendar');
120        const calendar = new FullCalendar.Calendar(calendarEl, {
121            initialView: 'dayGridMonth', // 預設檢視模式
122            locale: "zh-cn",   // 預設語言
123            contentHeight: 600,
124            headerToolbar: { // 工具列
125                left: 'prevYear,prev',
126                center: 'title',
127                right: 'today,next,nextYear'
128            },
129            buttonText: {  // 自訂翻譯
130                today: '今天',
131                month: '月',
132            },
133            events: [
134                {{ range .Site.RegularPages }} // 讀取所有已發表的文章,變成JSON陣列
135            {
136                title: '{{ .Title }}',
137                start: '{{ .Date.Format "2006-01-02" }}',
138                url: '{{ .RelPermalink }}'
139            },
140            {{ end }}
141        ],
142        eventMouseEnter: function (info) { // 加入滑鼠懸浮就顯示完整標題的功能
143            const tooltip = document.createElement('div');
144            tooltip.className = 'event-tooltip';
145            tooltip.innerHTML = `<strong>${info.event.title}</strong>`;
146            document.body.appendChild(tooltip);
147
148            tooltip.style.left = info.jsEvent.pageX + 'px';
149            tooltip.style.top = info.jsEvent.pageY + 'px';
150
151            info.el.addEventListener('mouseleave', function () {
152                tooltip.remove();
153            });
154        }
155    });
156    calendar.render();
157});
158</script>
159
160{{ end }}
在 content/page 下新建 calendar.md ,填入:
1---
2title: 日历
3layout: "calendar"
4menu:
5    main:
6        weight: 12
7        params:
8            icon: calendar
9---
icon 的话,可以去 这里 找到你喜欢的svg,新建一个 assets/icons/calendar.svg 粘贴进去就行。
然后就能在侧边栏加入日历,查看你写过的所有文章啦!
不过这个与热力图的功能有点重叠,而且统计的文章不分语言。(也好,可以用一些水文章撑一下场面)
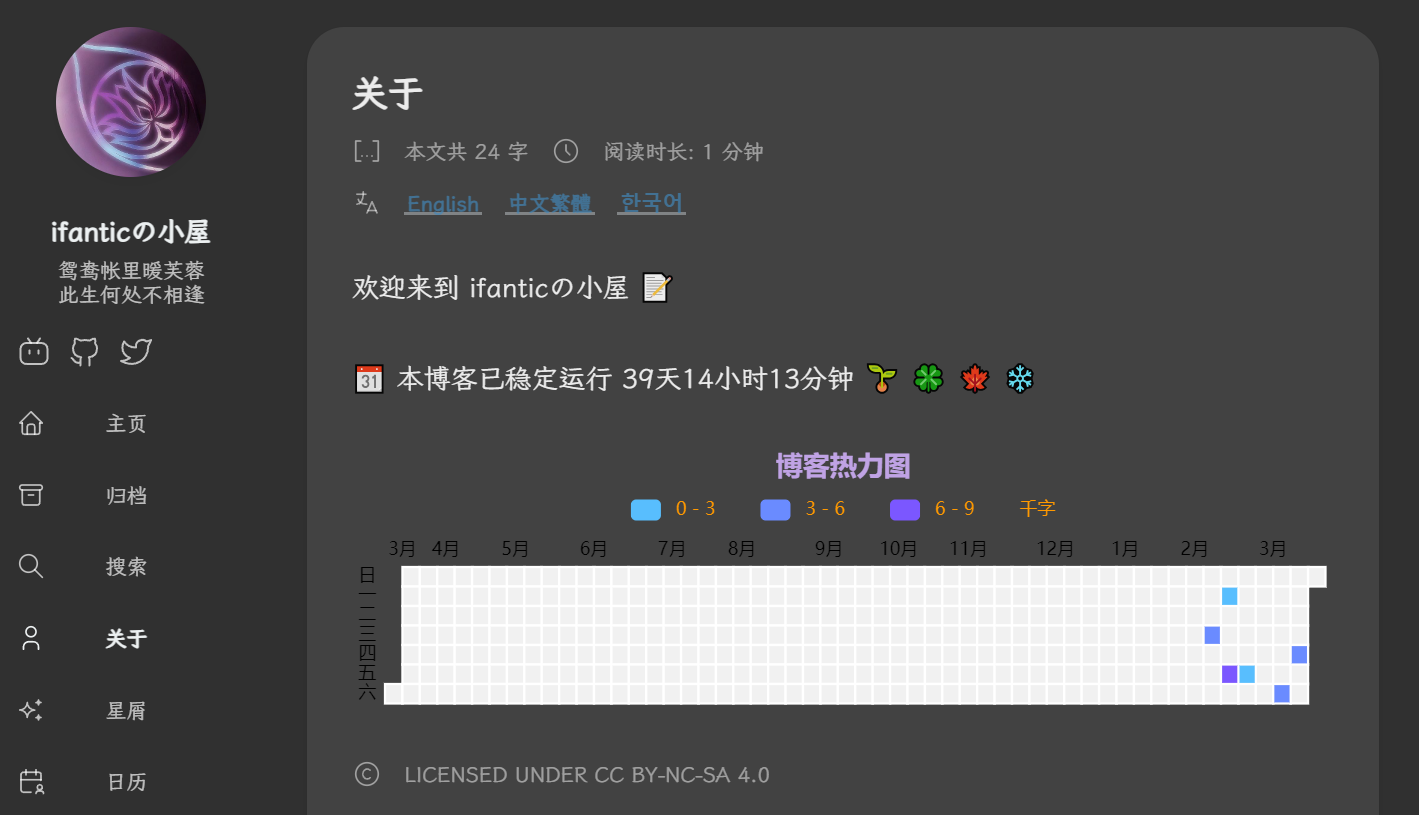
左边栏网站副标题换行
找到 layouts/partials/sidebar/left.html,修改第36行:
1<div class="site-meta">
2    <h1 class="site-name"><a href="{{ .Site.BaseURL | relLangURL }}">{{ .Site.Title }}</a></h1>
3    <h2 class="site-description">{{ .Site.Params.sidebar.subtitle }}</h2>
4    <h2 class="site-description">{{ .Site.Params.sidebar.subtitle | safeHTML }}</h2>
5</div>
然后在 hugo.yaml 中在要换行的地方加上 <br>:
1languages:
2    zh-cn:
3        params:
4            sidebar:
5                subtitle: "鸳鸯帐里暖芙蓉<br>此生何处不相逢"
就可以把诗当网站的简介啦!
右侧分类条优化
调整分类的样式并在首页显示分类的条目数量,然后给每个分类增加对应的颜色条。参考链接,把 layouts/partials/widget/categories.html 第11和12行改成:
1{{ range first $limit $context.Site.Taxonomies.categories.ByCount }}
2    <a href="{{ .Page.RelPermalink }}" class="font_size_{{ .Count }}">
3        {{ .Page.Title }}
4    <a href="{{ .Page.RelPermalink }}" class="font_size_{{ .Count }}" style="border-left: 6px solid {{ .Page.Params.style.background }}; filter:saturate(1.7);">
5        {{ .Page.Title }}<span class="category-count count-muted"> {{ .Count }}</span>
6    </a>
7{{ end }}
然后在 assets/scss/custom.scss 后面加上:
1.count-muted {
2  color: #b7bec5;  /* 常见灰色值,可根据需要调整 */
3  opacity: 0.8;    /* 可选:如果需要进一步淡化 */
4}
最后在每个分类的 _index.md 添加以下参数:
1---
2style:
3    background: "#d09daa"
4    color: "#fff"
5---
好看的配色可以去Color Hunt找找灵感,需要微调的话可以参考Color Hex。
最底下的标签云也可以照猫画虎,不过我觉得没必要给标签左侧也加上颜色条,还要找配色。所以只在后面加上统计数就算了,修改 layouts/partials/widget/tag-cloud.html:
1<a href="{{ .Page.RelPermalink }}" class="font_size_{{ .Count }}">
2    {{ .Page.Title }}
3    {{ .Page.Title }}  <span class="category-count count-muted"> {{ .Count }}</span>
4</a>
设置不能被搜索到的文章
找到 /layouts/page/search.json,把第三行换成这两行代码:
1{{- $pages := where .Site.RegularPages "Type" "in" .Site.Params.mainSections -}}
2{{- $notHidden := where .Site.RegularPages "Params.hidden" "!=" true -}}
3{{- $filtered := ($pages | intersect $notHidden) -}}
4{{- $searchable := where .Site.RegularPages "Params.nosearch" "!=" true -}}
5{{- $filtered := ($pages | intersect $notHidden | intersect $searchable) -}}
然后在你想要不被搜索到的文章头部加上这个参数就可以啦。
1nosearch: true
添加标签墙
参考Hugo stack 主题美化 - 修改标签页页面 | Laphel,新建 layouts/tags/terms.html 填入:
 1{{ define "main" }}
 2  <h1 class="tags-title">📖 Tags</h1>
 3  <p class="tags-subtitle">{{ len .Data.Terms }} Tags To Explore</p>
 4  <div class="tag-cloud">
 5    {{ range shuffle .Data.Terms.Alphabetical }}
 6      <a href="{{ .Page.RelPermalink }}" class="tag" style="font-size: {{ add 12 (mul .Count 2) }}px;">
 7        {{ .Page.Title }} ({{ .Count }})
 8      </a>
 9    {{ end }}
10  </div>
11{{ end }}
assets/scss/custom.scss 添加样式:
 1// Tags 页面样式
 2.tags-title {
 3  text-align: center;
 4  font-size: 2em;
 5  color: #b213b5;
 6}
 7.tags-subtitle {
 8  text-align: center;
 9  margin-top: -30px;
10  font-weight: bold;
11  color: #336D82;
12}
13.tag-cloud {
14  text-align: center;
15  display: flex;
16  flex-wrap: wrap;
17  justify-content: center;
18  align-items: center; /* 上下居中 */
19  min-height: 50vh; /* 可以根据需要调整高度 */
20  padding: 20px 0;
21}
22
23.tag {
24  display: inline-block;
25  margin: 8px;
26  text-decoration: none;
27  padding: 5px 10px 5px 16px; /* 左侧留出更多空间给标签形状 */
28  border-radius: 5px;
29  transition: all 0.3s ease-in-out;
30  background-color: #693382;
31  color: #F5ECE0;
32  position: relative; /* 为伪元素定位 */
33  border-left: none; /* 移除左边框 */
34}
35
36/* 创建标签上的小圆点 */
37.tag:after {
38  content: "";
39  position: absolute;
40  top: 50%;
41  left: 6px;
42  width: 4px;
43  height: 4px;
44  border-radius: 80%;
45  background-color: #EFEFEF;
46  transform: translateY(-50%);
47}
48
49.tag:hover {
50  color: #fff;
51  background-color: #3498db;
52  transform: scale(1.1); /* 悬停时稍微放大 */
53}
54
55/* 悬停时也改变标签形状的颜色 */
56.tag:hover:before {
57  border-color: transparent #3498db transparent transparent;
58}
时光胶囊
参考Hugo:增加年月日时间进度条,我稍加改动改成了短代码。新建 layout/shortcodes/timing.html:
  1{{/* Responsive Progress Bars Shortcode */}}
  2{{ $barColor := .Get "barColor" | default "#9188f199" }}
  3{{ $bgColor := .Get "bgColor" | default "#f8f8f883" }}
  4{{ $maxWidth := .Get "maxWidth" | default "100%" }}
  5
  6<div class="progress-container">
  7    <div class="progress-item">
  8        <div class="label-container">
  9            <span class="progress-label">Day</span>
 10        </div>
 11        <div class="progress-wrapper">
 12            <div class="progress">
 13                <div class="progress-bar" id="todayProgress" role="progressbar" style="width: 0%;" aria-valuenow="0" aria-valuemin="0" aria-valuemax="100">0%</div>
 14            </div>
 15            <span class="remaining-time" id="dayRemaining"></span>
 16        </div>
 17    </div>
 18    <div class="progress-item">
 19        <div class="label-container">
 20            <span class="progress-label">Month</span>
 21        </div>
 22        <div class="progress-wrapper">
 23            <div class="progress">
 24                <div class="progress-bar" id="monthProgress" role="progressbar" style="width: 0%;" aria-valuenow="0" aria-valuemin="0" aria-valuemax="100">0%</div>
 25            </div>
 26            <span class="remaining-time" id="monthRemaining"></span>
 27        </div>
 28    </div>
 29    <div class="progress-item">
 30        <div class="label-container">
 31            <span class="progress-label">Year</span>
 32        </div>
 33        <div class="progress-wrapper">
 34            <div class="progress">
 35                <div class="progress-bar" id="yearProgress" role="progressbar" style="width: 0%;" aria-valuenow="0" aria-valuemin="0" aria-valuemax="100">0%</div>
 36            </div>
 37            <span class="remaining-time" id="yearRemaining"></span>
 38        </div>
 39    </div>
 40</div>
 41
 42<style>
 43.progress-container {
 44    width: 100%;
 45    max-width: {{ $maxWidth }};
 46    margin: 0 auto;
 47}
 48.progress-container .progress-item {
 49    margin-bottom: 10px;
 50    display: flex;
 51    width: 100%;
 52}
 53.progress-container .label-container {
 54    min-width: 70px;
 55    flex-shrink: 0;
 56    text-align: right;
 57}
 58.progress-container .progress-wrapper {
 59    flex-grow: 1;
 60    display: flex;
 61    align-items: center;
 62}
 63.progress-container .progress-label {
 64    margin-right: 10px;
 65}
 66.progress-container .progress {
 67    height: 20px;
 68    flex-grow: 1;
 69    margin-bottom: 0px;
 70    overflow: hidden;
 71    background-color: {{ $bgColor }};
 72    border-radius: 4px;
 73    -webkit-box-shadow: inset 0 1px 2px rgb(0 0 0 / 10%);
 74    box-shadow: inset 0 1px 2px rgb(0 0 0 / 10%);
 75}
 76.progress-container .progress-bar {
 77    float: left;
 78    width: 0;
 79    height: 100%;
 80    font-size: 12px;
 81    line-height: 20px;
 82    color: #fff;
 83    text-align: center;
 84    background-color: {{ $barColor }};
 85    -webkit-box-shadow: inset 0 -1px 0 rgb(0 0 0 / 15%);
 86    box-shadow: inset 0 -1px 0 rgb(0 0 0 / 15%);
 87    -webkit-transition: width .6s ease;
 88    -o-transition: width .6s ease;
 89    transition: width .6s ease;
 90}
 91.progress-container .remaining-time {
 92    margin-left: 10px;
 93    margin-right: 10px;
 94    font-size: 12px;
 95    white-space: nowrap;
 96    width: 80px;
 97    text-align: left;
 98    font-size: 90%;
 99}
100
101</style>
102
103{{ $js := `
104function updateProgress(progressId, newValue, remainingId, remainingValue, unit) {
105    document.getElementById(progressId).style.width = newValue + '%';
106    document.getElementById(progressId).setAttribute('aria-valuenow', newValue);
107    document.getElementById(progressId).textContent = newValue + '%';
108    document.getElementById(remainingId).textContent = '剩余' + remainingValue + unit;
109}
110
111document.addEventListener('DOMContentLoaded', function() {
112    const now = new Date();
113
114    // Calculate elapsed time for the day
115    const startOfDay = new Date(now.getFullYear(), now.getMonth(), now.getDate());
116    const elapsedTime = now - startOfDay;
117    const dayPercentage = Math.round((elapsedTime / (1000 * 60 * 60 * 24)) * 100);
118    const remainingHours = Math.round((24 - now.getHours() - now.getMinutes()/60) * 10) / 10;
119
120    // Calculate elapsed days for the month
121    const startOfMonth = new Date(now.getFullYear(), now.getMonth(), 1);
122    const elapsedDays = (now - startOfMonth) / (1000 * 60 * 60 * 24);
123    const daysInMonth = new Date(now.getFullYear(), now.getMonth() + 1, 0).getDate();
124    const monthPercentage = Math.round((elapsedDays / daysInMonth) * 100);
125    const remainingDays = Math.ceil(daysInMonth - elapsedDays);
126
127    // Calculate elapsed days for the year
128    const startOfYear = new Date(now.getFullYear(), 0, 1);
129    const elapsedDaysInYear = (now - startOfYear) / (1000 * 60 * 60 * 24);
130    const daysInYear = (new Date(now.getFullYear() + 1, 0, 1) - new Date(now.getFullYear(), 0, 1)) / (1000 * 60 * 60 * 24);
131    const yearPercentage = Math.round((elapsedDaysInYear / daysInYear) * 100);
132    const remainingMonths = 12 - now.getMonth() - (now.getDate()/daysInMonth);
133    const remainingMonthsRounded = Math.ceil(remainingMonths);
134
135    updateProgress('todayProgress', dayPercentage, 'dayRemaining', remainingHours, '小时');
136    updateProgress('monthProgress', monthPercentage, 'monthRemaining', remainingDays, '天');
137    updateProgress('yearProgress', yearPercentage, 'yearRemaining', remainingMonthsRounded, '月');
138});
139` }}
140
141<script>{{ $js | safeJS }}</script>
用 {{< timing >}} 就可以咯 ~
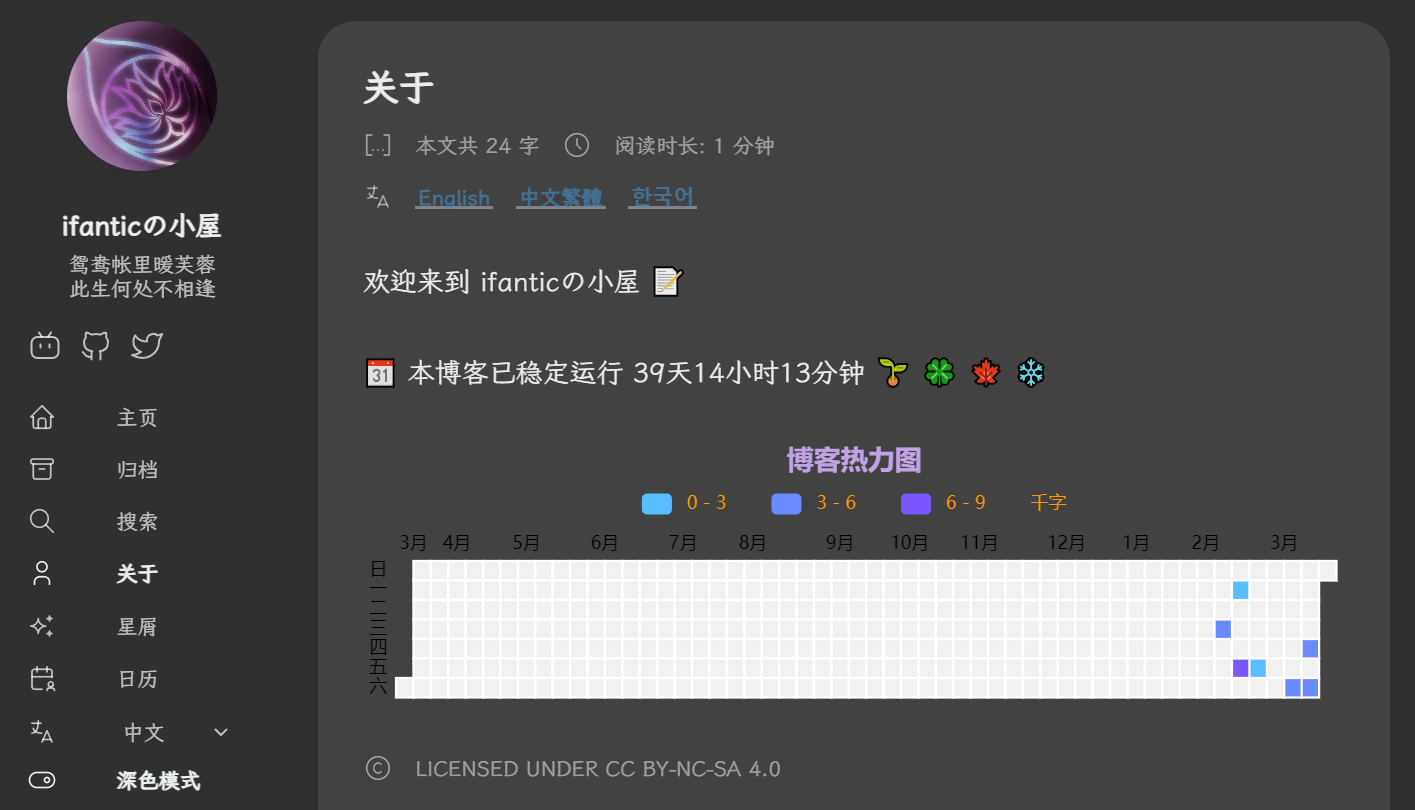
左侧导航栏缩小间距
原先的导航栏样式有点宽,换语言和切换深色模式还要往下滑。于是想着缩小一下这个间距。
参考链接,找到 /assets/scss/partials/menu.scss 中的这段代码,把 gap: 25px; 改成 gap: 15px; 看起来就饱满了。
 1#main-menu {
 2    &, .menu-bottom-section ol {
 3        flex-direction: column;
 4        gap: 30px;
 5
 6        @include respond(xl) {
 7            gap: 25px;
 8            gap: 15px;
 9        }
10    }
11}
提高自定义字体加载速度
偶然看到这篇文章:利用 unicode-range 属性, 提高自定义字体加载速度
立马在 assets/scss/custom.scss 加上:
1@font-face {
2  unicode-range: U+4E00-9FFF,U+0025-00F0,U+3040-30FF,U+1100-11FF,U+3130-318F,U+AC00-D7FF;
3  // U+4E00-9FFF CJK中日韩统一表意文字,包括简繁中文
4  // U+AC00-D7FF 韩语
5  // U+3040-30FF 日语
6  // U+0025-00F0 数字、字母、拉丁语等
7  // U+1100-11FF,U+3130-318F 韩文辅音
8}
好像有点作用 (也可能是心理安慰?
短代码合集
有时候想插入短代码还要翻以前的文章,有点烦人。忘记从哪里看到有人弄了个短代码的总结页,但是也没发现有人做过这个的教程,只能自己用AI手搓一个。
成品:短代码合集
- 新建一个静态页面
shortcodes.md:
1---
2title: "短代码合集"
3date: 2025-04-13
4layout: "shortcodes"
5slug: shortcodes
6description: "Hugo 博客短代码集合,点击即可复制"
7---
- 在
layouts/_default/目录下新建shortcodes.html:
  1{{ define "main" }}
  2<div class="shortcodes-container">
  3    <h1>Hugo Shortcodes 速查表</h1>
  4    <div class="shortcodes-intro">
  5        <p>这些是Hugo中常用的Shortcodes列表,点击即可复制使用。</p>
  6    </div>
  7    <div class="category-container">
  8        <div class="category-nav">
  9            <button class="category-btn active" data-category="all">全部</button>
 10            <button class="category-btn" data-category="text">文本格式</button>
 11            <button class="category-btn" data-category="layout">布局排版</button>
 12            <button class="category-btn" data-category="effect">动态效果</button>
 13            <button class="category-btn" data-category="other">其他功能</button>
 14        </div>
 15    </div>
 16    <div id="shortcodesGrid" class="shortcodes-grid"></div>
 17    <div id="copyNotification" class="copy-notification">已复制到剪贴板!</div>
 18</div>
 19
 20<script>
 21document.addEventListener('DOMContentLoaded', function() {
 22    const shortcodes = [
 23        // 文本格式
 24        { name: "文本黑幕", code: "{{ "<span class=\"shady\">数据删除!</span>" | safeHTML }}", category: "text" },
 25        { name: "键盘样式", code: "{{ "<kbd>Ctrl</kbd>" | safeHTML }}", category: "text" },
 26
 27        // 布局排版
 28        { name: "文字居左", code: "{{ "{{< align left \"文字居左\" >}}" | safeHTML }}", category: "layout" },
 29        { name: "文字居中", code: "{{ "{{< align center \"文字居中\" >}}" | safeHTML }}", category: "layout" },
 30        { name: "文字居右", code: "{{ "{{< align right \"文字居右\" >}}" | safeHTML }}", category: "layout" },
 31
 32        // 动态效果
 33        { name: "基本摇晃效果", code: "{{ "{{< shake effect=\"shake\" >}}这是基本的摇晃效果。{{< /shake >}}" | safeHTML }}", category: "effect" },
 34        { name: "剧烈摇晃效果", code: "{{ "{{< shake effect=\"shake-hard\" >}}这个段落有剧烈摇晃效果。{{< /shake >}}" | safeHTML }}", category: "effect" },
 35        { name: "慢速摇晃效果", code: "{{ "{{< shake effect=\"shake-slow\" >}}这个段落有慢速摇晃效果。{{< /shake >}}" | safeHTML }}", category: "effect" },
 36
 37        // 其他功能可以在这里添加
 38        { name: "仿Github样式", code: "{{ "{{< github\n  name=\"链接标题\"\n  link=\"#\"\n  description=\"内容描述\"\n  color=\"#F48201\"\n  language=\"Go\"\n>}}" | safeHTML }}", category: "other" },
 39    ];
 40
 41    const grid = document.getElementById('shortcodesGrid');
 42    const notification = document.getElementById('copyNotification');
 43    const categoryButtons = document.querySelectorAll('.category-btn');
 44
 45    // 计算各分类的短代码数量
 46    const categoryCounts = {
 47        all: shortcodes.length
 48    };
 49
 50    shortcodes.forEach(item => {
 51        if (!categoryCounts[item.category]) {
 52            categoryCounts[item.category] = 0;
 53        }
 54        categoryCounts[item.category]++;
 55    });
 56
 57    // 更新分类按钮上显示的数量
 58    categoryButtons.forEach(button => {
 59        const category = button.dataset.category;
 60        const count = categoryCounts[category] || 0;
 61        button.textContent = `${button.textContent} (${count})`;
 62    });
 63
 64    // 创建短代码块的函数
 65    function createShortcodeBlocks(category = 'all') {
 66        // 清空网格
 67        grid.innerHTML = '';
 68
 69        // 过滤短代码
 70        const filteredShortcodes = category === 'all'
 71            ? shortcodes
 72            : shortcodes.filter(item => item.category === category);
 73
 74        // 创建短代码块
 75        filteredShortcodes.forEach(item => {
 76            const block = document.createElement('div');
 77            block.className = 'shortcode-block';
 78            block.dataset.category = item.category;
 79
 80            const name = document.createElement('h3');
 81            name.textContent = item.name;
 82
 83            const code = document.createElement('pre');
 84            code.textContent = item.code;
 85
 86            block.appendChild(name);
 87            block.appendChild(code);
 88
 89            // 添加点击复制功能
 90            block.addEventListener('click', function() {
 91                navigator.clipboard.writeText(item.code).then(() => {
 92                    // 显示复制成功通知
 93                    notification.classList.add('active');
 94                    setTimeout(() => {
 95                        notification.classList.remove('active');
 96                    }, 2000);
 97                });
 98            });
 99
100            grid.appendChild(block);
101        });
102    }
103
104    // 初始加载全部短代码
105    createShortcodeBlocks();
106
107    // 添加分类按钮事件监听
108    categoryButtons.forEach(button => {
109        button.addEventListener('click', function() {
110            // 移除所有按钮的active类
111            categoryButtons.forEach(btn => btn.classList.remove('active'));
112            // 给当前点击的按钮添加active类
113            this.classList.add('active');
114
115            // 根据选中的分类显示短代码
116            const category = this.dataset.category;
117            createShortcodeBlocks(category);
118        });
119    });
120});
121</script>
122
123<style>
124.shortcodes-container {
125    max-width: 14400px;
126    padding: 10px;
127    margin-top: -3%;
128    transition: color 0.15s ease;
129    color: var(--body-text-color);
130}
131
132.shortcodes-intro {
133    margin-bottom: 30px;
134}
135
136.category-container {
137    margin-bottom: 20px;
138}
139
140.category-nav {
141    display: flex;
142    gap: 10px;
143    margin-bottom: 20px;
144    flex-wrap: wrap;
145}
146
147.category-btn {
148    padding: 8px 16px;
149    border: none;
150    border-radius: 4px;
151    background-color: #f0f0f0;
152    cursor: pointer;
153    transition: all 0.3s ease;
154    font-weight: 500;
155}
156
157.category-btn:hover {
158    background-color: #e0e0e0;
159}
160
161.category-btn.active {
162    background-color: #410445;
163    color: white;
164}
165
166.shortcodes-grid {
167    display: grid;
168    grid-template-columns: repeat(4, 1fr);
169    gap: 15px;
170}
171
172.shortcode-block {
173    background-color: #f9f8fa;
174    border: 1px solid #dee2e6;
175    border-radius: 6px;
176    padding: 15px;
177    cursor: pointer;
178    transition: all 0.3s ease;
179}
180
181.shortcode-block:hover {
182    box-shadow: 0 5px 8px rgba(201, 10, 188, 0.8);
183    transform: translateY(-2px);
184}
185
186.shortcode-block h3 {
187    margin-top: 0;
188    margin-bottom: 10px;
189    color: #333;
190}
191
192.shortcode-block pre {
193    margin: 0;
194    background-color: #ffffff;
195    padding: 5px;
196    border-radius: 4px;
197    white-space: pre-wrap;
198    word-break: break-all;
199    font-size: 14px;
200}
201
202[data-scheme="dark"] {
203    .shortcode-block {
204        background-color: #410445;
205        border: 1px solid #5f0865;
206    }
207    .shortcode-block pre {
208        background-color: #222222;
209    }
210    .shortcode-block h3{
211        color: #FFF8F8;
212    }
213    .shortcodes-container {
214        color: #FFF8F8;
215    }
216    .category-btn {
217        background-color: #333;
218        color: #ddd;
219    }
220    .category-btn:hover {
221        background-color: #444;
222    }
223    .category-btn.active {
224        background-color: #c90abc;
225        color: white;
226    }
227}
228
229.copy-notification {
230    position: fixed;
231    bottom: 20px;
232    left: 50%;
233    transform: translateX(-50%) translateY(100px);
234    background-color: rgba(0,0,0,0.8);
235    color: white;
236    padding: 10px 20px;
237    border-radius: 4px;
238    opacity: 0;
239    transition: all 0.3s ease;
240}
241
242.copy-notification.active {
243    transform: translateX(-50%) translateY(0);
244    opacity: 1;
245}
246
247@media (max-width: 1200px) {
248    .shortcodes-grid {
249        grid-template-columns: repeat(3, 1fr);
250    }
251}
252
253@media (max-width: 900px) {
254    .shortcodes-grid {
255        grid-template-columns: repeat(2, 1fr);
256    }
257}
258
259@media (max-width: 600px) {
260    .shortcodes-grid {
261        grid-template-columns: 1fr;
262    }
263
264    .category-nav {
265        justify-content: center;
266    }
267}
268</style>
269{{ end }}
注意:要用 Go 模板中形如 {{ "<span class=\"blur\">手动打码效果</span>" | safeHTML }} 的安全函数样式才能避免短代码被渲染出来;有双引号配置的参数要转义内部引号(在 " 前面打上 \);要换行的直接在对应位置加上 \n。
首页欢迎栏
刚好我的短代码合集不知道放哪里好,又不想放在侧边栏,干脆就放在首页这个欢迎栏上好了。参考Hugo Stack 主题美化 - 阿琦同学,在 layouts/index.html 的 {{ $pag := .Paginate ($filtered) }} 后面加入:
 1<!-- 首页欢迎字幅板块 -->
 2<div class="welcome">
 3    <p style="font-size: 2rem; text-align: center; font-weight: bold">
 4        <a href="/shortcodes" title="Link To Hugo Shortcodes Space">
 5            <span class="shake">👋</span>
 6            <span class="jump-text1" > Welcome</span>
 7            <span class="jump-text2"> To </span>
 8            <span class="jump-text3" style="color:#e99312">if</span><span class="jump-text4" style="color:#e99312">a</span
 9            ><span class="jump-text5" style="color:#e99312">n</span><span class="jump-text6" style="color:#e99312">t</span
10            ><span class="jump-text7" style="color:#e99312">ic</span>
11            <span class="jump-text8" style="color:#e99312">'s</span>
12            <span class="jump-text9" style="color:#e99312">Blog</span>
13        </a>
14    </p>
15</div>
16<!-- ------首页欢迎字幅板块------ -->
在 assets/scss/partials/sidebar.scss 加入:
  1//首页欢迎板块样式
  2.welcome {
  3  color: var(--card-text-color-main);
  4  background: var(--card-background);
  5  box-shadow: var(--shadow-l2);
  6  border-radius: 30px;
  7  display: inline-block;
  8}
  9
 10// 👋emoji实现摆动效果
 11.shake {
 12  display: inline-block;
 13  animation: shake 1s;
 14  animation-duration: 1s;
 15  animation-timing-function: ease;
 16  animation-delay: 0s;
 17  animation-iteration-count: 1;
 18  animation-direction: normal;
 19  animation-fill-mode: none;
 20  animation-play-state: running;
 21  animation-name: shake;
 22  animation-timeline: auto;
 23  animation-range-start: normal;
 24  animation-range-end: normal;
 25  animation-delay: 2s;
 26  @keyframes shake {
 27    0% {
 28      transform: rotate(0);
 29    }
 30    25% {
 31      transform: rotate(45deg) scale(1.2);
 32    }
 33    50% {
 34      transform: rotate(0) scale(1.2);
 35    }
 36    75% {
 37      transform: rotate(45deg) scale(1.2);
 38    }
 39    100% {
 40      transform: rotate(0);
 41    }
 42  }
 43}
 44// 实现字符跳动动画
 45.jump-text1 {
 46  display: inline-block;
 47  animation: jump 0.5s 1;
 48}
 49
 50.jump-text2 {
 51  display: inline-block;
 52  animation: jump 0.5s 1;
 53  animation-delay: 0.1s;
 54}
 55
 56.jump-text3 {
 57  display: inline-block;
 58  animation: jump 0.5s 1;
 59  animation-delay: 0.2s;
 60}
 61
 62.jump-text4 {
 63  display: inline-block;
 64  animation: jump 0.5s 1;
 65  animation-delay: 0.3s;
 66}
 67
 68.jump-text5 {
 69  display: inline-block;
 70  animation: jump 0.5s 1;
 71  animation-delay: 0.4s;
 72}
 73
 74.jump-text6 {
 75  display: inline-block;
 76  animation: jump 0.5s 1;
 77  animation-delay: 0.5s;
 78}
 79
 80.jump-text7 {
 81  display: inline-block;
 82  animation: jump 0.5s 1;
 83  animation-delay: 0.6s;
 84}
 85
 86.jump-text8 {
 87  display: inline-block;
 88  animation: jump 0.5s 1;
 89  animation-delay: 0.7s;
 90}
 91
 92.jump-text9 {
 93  display: inline-block;
 94  animation: jump 0.5s 1;
 95  animation-delay: 0.9s;
 96}
 97
 98@keyframes jump {
 99  0% {
100    transform: translateY(0);
101  }
102  50% {
103    transform: translateY(-20px);
104  }
105  100% {
106    transform: translateY(0);
107  }
108}
分类和标签页不分页
不修改之前分类页和标签页都会沿用 hugo.yaml 的全局分页配置 pagination: pagerSize: 3,有点难受。把 layouts/_default/list.html 里的所有内容删掉,换成:
 1{{ define "main" }}
 2    <header>
 3        <h3 class="section-title">
 4            {{ if eq .Parent (.GetPage "/") }}
 5                {{ T "list.section" }}
 6            {{ else }}
 7                {{ .Parent.Title }}
 8            {{ end }}
 9        </h3>
10        <div class="section-card">
11            <div class="section-details">
12                <h3 class="section-count">{{ T "list.page" (len .Pages) }}</h3>
13                <h1 class="section-term">{{ .Title }}</h1>
14                {{ with .Params.description }}
15                    <h2 class="section-description">{{ . }}</h2>
16                {{ end }}
17            </div>
18
19            {{- $image := partialCached "helper/image" (dict "Context" . "Type" "section") .RelPermalink "section" -}}
20            {{ if $image.exists }}
21                <div class="section-image">
22                    {{ if $image.resource }}
23                        {{- $Permalink := $image.resource.RelPermalink -}}
24                        {{- $Width := $image.resource.Width -}}
25                        {{- $Height := $image.resource.Height -}}
26
27                        {{- if (default true .Page.Site.Params.imageProcessing.cover.enabled) -}}
28                            {{- $thumbnail := $image.resource.Fill "120x120" -}}
29                            {{- $Permalink = $thumbnail.RelPermalink -}}
30                            {{- $Width = $thumbnail.Width -}}
31                            {{- $Height = $thumbnail.Height -}}
32                        {{- end -}}
33
34                        <img src="{{ $Permalink }}"
35                            width="{{ $Width }}"
36                            height="{{ $Height }}"
37                            loading="lazy">
38                    {{ else }}
39                        <img src="{{ $image.permalink }}" loading="lazy" />
40                    {{ end }}
41                </div>
42            {{ end }}
43        </div>
44    </header>
45    {{- $subsections := .Sections -}}
46    {{- $pages := .Pages | complement $subsections -}}
47
48    {{- if eq (len $pages) 0 -}}
49        {{/* If there are no normal pages, display subsections in list style, with pagination */}}
50        {{/* This happens with taxonomies like categories or tags */}}
51        {{- $pages = $subsections -}}
52        {{- $subsections = slice -}}
53    {{- end -}}
54    {{- with $subsections -}}
55        <aside>
56            <h2 class="section-title">{{ T "list.subsection" (len $subsections) }}</h2>
57            <div class="subsection-list">
58                <div class="article-list--tile">
59                    {{ range . }}
60                        {{ partial "article-list/tile" (dict "context" . "size" "250x150" "Type" "section") }}
61                    {{ end }}
62                </div>
63            </div>
64        </aside>
65    {{- end -}}
66
67    {{/* 检查是否是分类页面或标签页面 */}}
68    {{ $isCategoryPage := findRE "^/categories(/|/.+)" .RelPermalink }}
69    {{ $isTagPage := findRE "^/tags(/|/.+)" .RelPermalink }}
70    {{ if or $isCategoryPage $isTagPage }}
71        {{/* 分类和标签页面显示所有文章,不分页 */}}
72        <section class="article-list--compact">
73            {{ range $pages.ByDate.Reverse }}
74                {{ partial "article-list/compact" . }}
75            {{ end }}
76        </section>
77    {{ else }}
78        {{/* 其他页面使用常规分页 */}}
79        {{ $paginator := .Paginate $pages }}
80        <section class="article-list--compact">
81            {{ range $paginator.Pages }}
82                {{ partial "article-list/compact" . }}
83            {{ end }}
84        </section>
85        {{- partial "pagination.html" . -}}
86    {{ end }}
87
88    {{ partialCached "footer/footer" . }}
89{{ end }}
90{{ define "right-sidebar" }}
91    {{ partial "sidebar/right.html" (dict "Context" . "Scope" "homepage") }}
92{{ end }}
看起来轻描淡写就改好了,实际上花了我老大劲才定位到问题,解决之后发现自己好蠢()
最后的碎碎念..
还是看见别人好看的博客就手痒,于是又开始折腾起来。其实主要是移动端目录的问题困扰了我很久,改来改去都不尽人意,最后直接让 Claude 给我生成一版算了。接下来的日子估计会很忙,还是勉励下自己要抓紧学习呀。